Support our educational content for free when you buy through links on our site. Learn more
Can I Build My Own Robot for Wrestling? Materials & Tips (2026) 🤖
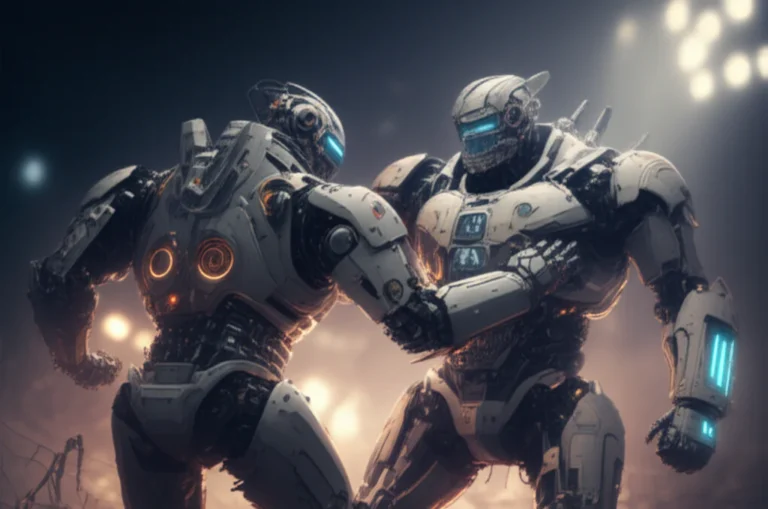
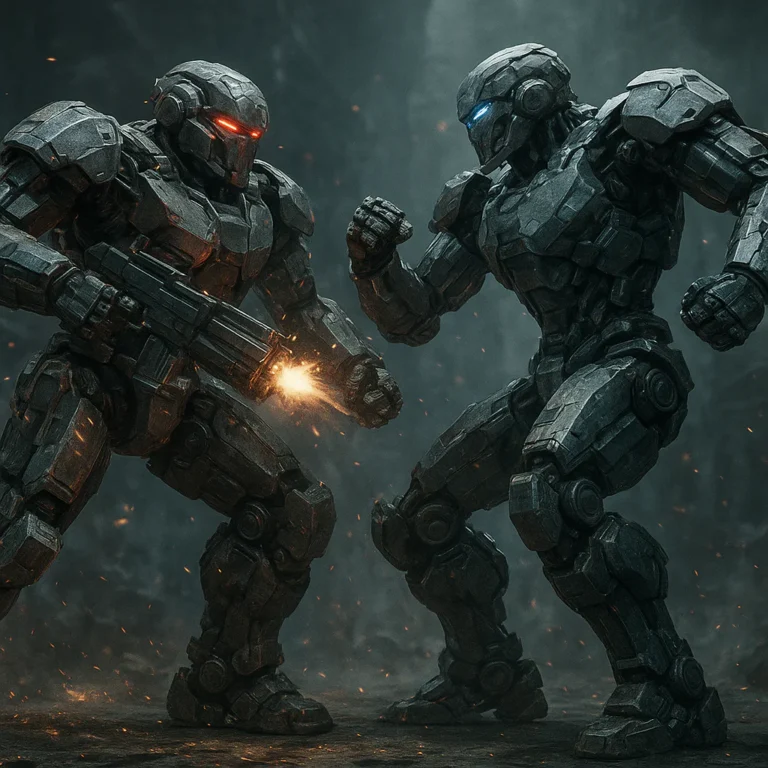
Ever watched a robot wrestling match and thought, “Could I build one of those mechanical beasts myself?” The answer is a resounding YES—and we’re here to guide you through every twist and turn of the journey. From choosing the right size and weight class to picking the perfect materials that can withstand brutal slamdowns, this article covers it all. Whether you’re dreaming of a nimble Beetleweight or a heavyweight contender, knowing which components and materials to use can make or break your robot’s performance in the ring.
Here’s a little secret from the Robot Wrestling™ engineers: sometimes, the difference between victory and defeat isn’t just raw power—it’s in the wiring and the tiniest fasteners holding your robot together. Later, we’ll reveal why a $5 wire can be the Achilles’ heel of even the most fearsome robot. Curious? Keep reading to unlock the full blueprint for building your own wrestling champion.
Key Takeaways
- You absolutely can build your own wrestling robot, from small beginner classes to heavyweight contenders.
- Material choice is critical: aluminum, titanium, polycarbonate, and UHMW plastic each serve unique roles in durability and weight management.
- Start small: Beetleweight class is ideal for beginners balancing cost, complexity, and performance.
- Invest in quality components: motors from Maxon or BaneBots, Spektrum radios, and LiPo batteries ensure reliability.
- Design smart: use CAD software like Fusion 360 to perfect your robot before fabrication.
- Don’t overlook wiring and fasteners: secure connections and threadlocker can prevent match-ending failures.
Ready to dive into the nuts and bolts of robot wrestling? Let’s get building!
Table of Contents
- ⚡️ Quick Tips and Facts About Building Your Own Wrestling Robot
- 🤖 The Evolution of Robot Wrestling: A Brief History and Materials Overview
- 🎯 Introduction: Mastering the Art of Designing Your Own Combat Robot
- 📏 Step 1: Choosing the Perfect Size and Weight Class for Your Wrestling Robot
- 💰 Step 2: Researching Components and Setting a Realistic Budget for Your Robot Build
- ✏️ Step 3: Crafting Your Robot’s Initial Design and Concept
- 🔧 Step 4: Selecting the Best Materials and Components for Durability and Performance
- 🖥️ Step 5: Using Computer-Aided Design (CAD) to Perfect Your Robot’s Blueprint
- 🏗️ Step 6: Fabrication and Manufacturing of Custom Robot Parts
- 🔩 Step 7: Assembling Your Robot: Tips for a Solid Build
- ⚡ Step 8: Wiring, Electronics, and Control Systems for Responsive Robot Wrestling
- 🧪 Step 9: Testing, Troubleshooting, and Tweaking Your Wrestling Robot
- 🎉 Step 10: Taking Your Robot to the Ring – First Battles and Beyond
- 🔍 Step 11: Post-Match Evaluation and Continuous Improvement Strategies
- ⚙️ Essential Tools and Workshop Setup for Building Combat Robots
- 🛠️ Common Challenges and How to Overcome Them in Robot Wrestling Builds
- 💡 Expert Tips and Tricks from Robot Wrestling Veterans
- 📚 Recommended Resources, Tutorials, and Communities for Aspiring Robot Builders
- 🧾 Conclusion: Your Journey to Building a Winning Wrestling Robot
- 🔗 Recommended Links for Robot Wrestling Enthusiasts
- ❓ Frequently Asked Questions About Building Wrestling Robots
- 📖 Reference Links and Further Reading
⚡️ Quick Tips and Facts About Building Your Own Wrestling Robot
Before you start sparking up the welder, let’s look at the baseline of what it takes to enter the arena. Understanding the 8 Key Components & Technologies in Modern Robot Wrestling is your first step toward glory.
| Fact/Tip | Description |
|---|---|
| Feasibility | ✅ Yes! You can absolutely build one, from 75g “Fleaweights” to 340lb “Super Heavyweights.” |
| Primary Materials | Aluminum (6061 or 7075), Titanium, Polycarbonate (Lexan), and UHMW plastic. |
| Control Systems | 2.4 GHz Digital Radio Systems (like Spektrum) are the industry standard for zero interference. |
| Power Source | Lithium Polymer (LiPo) batteries offer the best power-to-weight ratio. |
| The “Golden Rule” | Weight is your enemy. Every gram spent on “cool” is a gram taken from “armor.” |
| Pro Tip | Always build a “drive base” first. A robot that can’t move is just a very expensive paperweight. |
🤖 The Evolution of Robot Wrestling: A Brief History and Materials Overview

Robot wrestling isn’t just about two remote-controlled cars smashing into each other; it’s a high-stakes engineering chess match. Historically, the sport evolved from early Sumo-style competitions in Japan to the high-impact kinetic energy monsters we see in the Robot Wrestling League today.
In the early days, builders used heavy steel and lead-acid batteries. Today, we’ve shifted toward aerospace-grade materials. We’ve seen a massive transition from brushed DC motors to high-efficiency brushless outrunner motors, which provide insane torque in a tiny package. But here’s a question to keep you up at night: If you build the strongest robot in the world, why is it that a simple $5 wire is usually the reason most champions lose their title? We’ll reveal the secret to “bulletproofing” your electronics later on. 🛠️
🎯 Introduction: Mastering the Art of Designing Your Own Combat Robot

So, you want to build a mechanical gladiator? We love that energy! At Robot Wrestling™, we’ve seen everything from cardboard prototypes to $20,000 masterpieces. Building a robot is an iterative journey. As noted in the Instructables guide, “Design is an iterative process. You will never get it right the first time.”
Whether you are aiming for a Robot Design that focuses on grappling or a high-speed “rammer,” the fundamentals remain the same: Durability, Maneuverability, and Power. You’re not just building a machine; you’re building an extension of your own competitive spirit.
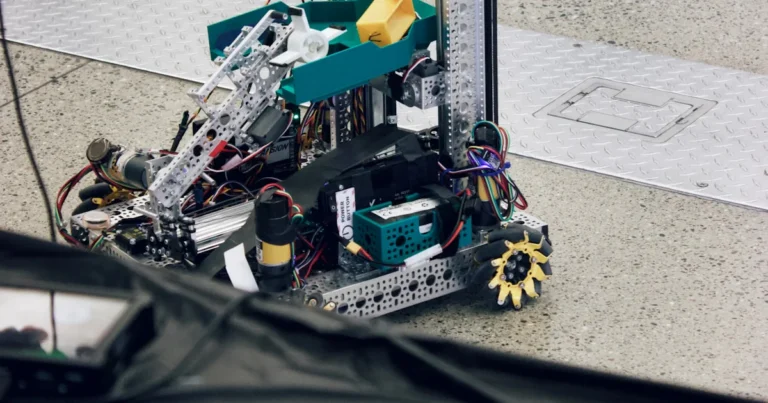
📏 Step 1: Choosing the Perfect Size and Weight Class for Your Wrestling Robot
Size matters, but bigger isn’t always better. In the world of Competitions, weight classes define your budget and your complexity.
- Fleaweight (75g) & Fairyweight (150g): Great for desk-top battles.
- Antweight (1 lb) & Beetleweight (3 lbs): The “sweet spot” for beginners. Affordable and destructive.
- Featherweight (30 lbs): Where things start getting dangerous.
- Heavyweight (220 lbs): The big leagues. Think BattleBots or Robot Wars.
Our Recommendation: Start with a Beetleweight. It’s large enough to use “real” components but small enough that a mistake won’t cost you a month’s rent.
💰 Step 2: Researching Components and Setting a Realistic Budget for Your Robot Build
Don’t let the “cool factor” drain your bank account. According to industry experts, a competitive Heavyweight can cost between $4,000 and $15,000+. However, a solid Antweight can be built for much less.
We suggest looking into Opinion Pieces regarding “Budget vs. Performance.” You need to account for:
- The Robot itself (Motors, ESCs, Frame).
- The Radio Gear (Transmitter/Receiver).
- The Support Gear (Chargers, Tools, Spare Parts).
Pro Tip: Always buy two of everything. If it can break, it will break during your second match.
✏️ Step 3: Crafting Your Robot’s Initial Design and Concept
Before touching a wrench, grab a pencil. Or better yet, a piece of cardboard.
- The “Cardboard-Bot”: Build a full-scale model out of cardboard to see if your components actually fit.
- Center of Gravity (CoG): Keep it low. A wrestling robot that tips over is a sitting duck.
- Drive Configuration: Will you use 2-wheel drive (zippy) or 4-wheel drive (maximum traction)?
🔧 Step 4: Selecting the Best Materials and Components for Durability and Performance
This is where the “Wrestling” part of the robot comes in. You need materials that can take a suplex and keep on ticking.
Material Performance Ratings
| Material | Strength | Weight | Cost | Best Use |
|---|---|---|---|---|
| Aluminum 6061 | 6/10 | 8/10 | 9/10 | Internal frames/supports |
| Titanium (Grade 5) | 10/10 | 7/10 | 2/10 | Armor and high-impact zones |
| Polycarbonate | 5/10 | 9/10 | 8/10 | Top covers/Electronics protection |
| UHMW Plastic | 7/10 | 9/10 | 7/10 | Shock-absorbing bumpers |
🔋 Power and Propulsion
You need high-torque motors. Brands like Maxon and Tamiya are legendary for their reliability in smaller builds, while BaneBots gearboxes are the gold standard for mid-to-heavyweight drivetrains.
- Motors: Look for high-torque DC or Brushless motors.
- Batteries: Turnigy or Gens ace LiPo batteries are our go-to for high discharge rates.
👉 Shop Components on:
- BaneBots Gearboxes: Amazon
- Maxon Motors: Maxon Official Website
- LiPo Batteries: Amazon | Etsy
🖥️ Step 5: Using Computer-Aided Design (CAD) to Perfect Your Robot’s Blueprint
If you want to win, you can’t “wing it.” Using CAD software allows you to check for interference and calculate your weight before you buy a single bolt.
- Fusion 360: The industry standard for hobbyists (free for personal use!).
- SolidWorks: Professional grade, great if you have a student license.
- TinkerCAD: As mentioned in the featured video, this is a fantastic, free, web-based tool for absolute beginners to prototype digitally.
🏗️ Step 6: Fabrication and Manufacturing of Custom Robot Parts
How do you turn a digital file into a metal beast?
- 3D Printing: Excellent for Antweights or internal mounts for larger bots. Use TPU (flexible) for parts that need to take hits.
- CNC Machining: For precision aluminum frames.
- Waterjet Cutting: The fastest way to cut thick Titanium or Steel armor.
❌ Don’t try to hand-saw Titanium. You will lose your mind and your saw blades.
✅ Do use services like SendCutSend or OshCut for professional-grade metal parts.
🔩 Step 7: Assembling Your Robot: Tips for a Solid Build
Assembly is where the “engineering” meets the “wrestling.”
- Fasteners: Use Grade 8 bolts or higher. Cheap hardware store screws will shear off instantly.
- Threadlocker: Loctite 242 (Blue) is mandatory. Robots vibrate. A lot. Without Loctite, your robot will literally unscrew itself in the ring.
- Wiring Management: Use zip ties. Loose wires get caught in gears.
⚡ Step 8: Wiring, Electronics, and Control Systems for Responsive Robot Wrestling
This is the “brain” of your bot. You need a system that responds instantly to your commands.
- Microcontrollers: Arduino Uno or Raspberry Pi are popular for autonomous or semi-autonomous wrestling bots.
- ESCs (Electronic Speed Controllers): These translate your radio signals into motor movement. We recommend FingerTech or Castle Creations for their “bulletproof” reputation.
- Radio: A Spektrum DX6e is a fantastic investment for any serious builder.
👉 CHECK PRICE on:
🧪 Step 9: Testing, Troubleshooting, and Tweaking Your Wrestling Robot
Remember the “featured video” by Gregory Ortega Zelaya? He shared a hilarious (and painful) anecdote about accidentally tasering himself during a project. ⚡ The lesson? Safety first!
Always test your robot on a “test stand” (wheels off the ground) before putting it on the floor.
- The “Burn-in” Test: Run your motors for 5 minutes straight. If something smells like burning electronics, you’ve found a weak point!
- Radio Range Test: Make sure you don’t lose control when the robot is 50 feet away.
🎉 Step 10: Taking Your Robot to the Ring – First Battles and Beyond
Your first match will be a blur of adrenaline. Check out our Event Announcements to find a local “smoker” or “underground” event to test your mettle.
What to bring to the pits:
- A soldering iron (we love the Pinecil or Weller).
- Spare zip ties and duct tape.
- Extra batteries (fully charged!).
🔍 Step 11: Post-Match Evaluation and Continuous Improvement Strategies
Win or lose, the “Post-Mortem” is vital.
- Review the Footage: Did your robot get pushed around? You might need grippier tires like Colson Urethane Wheels.
- Check for Stress Fractures: Look at your frame. If the metal is bending, you need to reinforce that area or switch to 7075 Aluminum.
- The “Secret” Revealed: Earlier, we asked why a $5 wire causes losses. It’s because of vibration. Most robots fail because a connector jiggled loose. Solder your connections instead of using crimps whenever possible!
⚙️ Essential Tools and Workshop Setup for Building Combat Robots
You don’t need a factory, but a kitchen table won’t cut it.
- Hex Key Set: Get a high-quality set like Bondhus.
- Digital Calipers: For measuring parts down to the millimeter.
- Multimeter: Essential for troubleshooting electrical gremlins.
👉 Shop Tools on:
🛠️ Common Challenges and How to Overcome Them in Robot Wrestling Builds
- Weight Creep: You designed it to be 3 lbs, but it’s 3.2 lbs.
- Solution: Drill “lightening holes” in non-structural areas.
- Traction Issues: Your robot is powerful but just spins its wheels.
- Solution: Use softer rubber or silicone-coated wheels.
- Signal Loss: The metal arena acts like a Faraday cage.
- Solution: Ensure your receiver antenna is not shielded by metal or carbon fiber.
💡 Expert Tips and Tricks from Robot Wrestling Veterans
- “Fail Fast”: Don’t spend six months on a design that hasn’t been tested. Build a “ugly” version in a weekend and break it.
- Redundancy: If you have the weight, use two smaller batteries in parallel instead of one large one. If one fails, you’re still in the fight.
- Study the Greats: Watch Famous Matches and look at how the winners drive. Often, the better driver beats the better robot.
📚 Recommended Resources, Tutorials, and Communities for Aspiring Robot Builders
- Builders Database: BuildersDB – The place to register for events.
- Robot Marketplace: The Robot Marketplace – A one-stop shop for combat-rated parts.
- McMaster-Carr: McMaster-Carr – If they don’t have the bolt you need, it doesn’t exist.
- Reddit r/BattleBots: A thriving community of builders willing to help.
Are you ready to hear the sound of metal on metal? The arena is waiting…
🧾 Conclusion: Your Journey to Building a Winning Wrestling Robot

Building your own robot for wrestling is not just a possibility—it’s an exhilarating challenge that blends creativity, engineering, and competitive spirit. From selecting the right materials like aluminum and polycarbonate to choosing powerful motors from trusted brands like Maxon and BaneBots, every decision shapes your robot’s destiny in the arena.
Remember the mystery we teased earlier about why a simple $5 wire can cost you a match? It’s all about vibration-proof wiring and secure connections—the unsung heroes of robot reliability. Solder your connections, use quality connectors, and apply threadlocker to fasteners to keep your robot battle-ready.
Whether you start small with a Beetleweight or dive into the Heavyweight class, the key is iterative design, rigorous testing, and learning from every match. As veterans of the Robot Wrestling League say: “Every robot you build will be a little bit better than the last.” So, gear up, get building, and prepare to hear the thrilling clang of metal in the ring!
🔗 Recommended Links for Robot Wrestling Enthusiasts
-
BaneBots Gearboxes:
Amazon | BaneBots Official Website -
Maxon Motors:
Maxon Official Website -
Spektrum DX6e Radio System:
Amazon -
Bondhus Hex Key Set:
Amazon -
Recommended Books:
❓ Frequently Asked Questions About Building Wrestling Robots
Where can I find resources and tutorials for building battle robots for the Robot Wrestling League?
Answer:
Start with the Robot Wrestling™ Robot Design category for in-depth articles and tutorials. Other excellent resources include BuildersDB for event registration and community support, and Robot Marketplace for parts and advice. YouTube channels like Adam Savage’s Tested and BattleBots also provide hands-on tutorials and inspiration.
Are there any safety regulations for building and competing with wrestling robots?
Answer:
Absolutely. Safety is paramount. Most leagues, including the Robot Wrestling League, require robots to have secure armor, failsafe kill switches, and battery safety measures such as proper fusing and fireproof containment. Always check the specific competition’s rulebook. For example, the Robot Wrestling League mandates a remote kill switch to immediately disable your robot in emergencies.
How do I design a robot for optimal balance and agility in wrestling matches?
Answer:
Balance starts with a low center of gravity (CoG)—keep heavy components like batteries and motors as low as possible. Use CAD software like Fusion 360 to simulate weight distribution. Agility depends on your drivetrain: 4-wheel drive offers traction, but 2-wheel drive can be more nimble. Tires with good grip, like Colson urethane wheels, improve maneuverability. Remember, a robot that can dodge is a robot that can survive.
What types of motors and actuators are used in robot wrestling?
Answer:
High-torque brushless DC motors are preferred for their efficiency and power-to-weight ratio. Brands like Maxon and BaneBots are popular. For weaponry or precise movements, servo motors or linear actuators may be used. Electronic Speed Controllers (ESCs) like Castle Creations or FingerTech translate control signals into smooth motor operation.
Which materials are best for constructing durable robot armor?
Answer:
Titanium Grade 5 is the gold standard for armor due to its strength-to-weight ratio but is costly. 7075 Aluminum is a lighter, more affordable alternative with good impact resistance. Polycarbonate (Lexan) is excellent for transparent panels and electronics protection. UHMW plastic is used for bumpers and shock absorption. Your choice depends on your robot’s weight class and budget.
How much does it cost to build a robot for wrestling competitions?
Answer:
Costs vary widely. Small robots (Antweight/Beetleweight) can be built for a few hundred dollars, while competitive Heavyweights may require $4,000 to $15,000 or more. Budget for motors, batteries, electronics, fabrication, and spare parts. Remember, investing in quality components often saves money in the long run by reducing failures.
What are the basic components required to build a wrestling robot?
Answer:
- Chassis/frame: Aluminum or steel structure
- Motors: Drive and weapon motors (brushless or brushed)
- Power source: LiPo or NiCad batteries
- Control system: Radio transmitter/receiver and ESCs
- Wheels or tracks: For traction and mobility
- Armor: To protect vital components
- Wiring and connectors: For electrical connections
- Sensors (optional): For autonomous features or feedback
How do I design a robot specifically for wrestling competitions?
Answer:
Focus on strength, traction, and control. Your robot should be able to push, lift, or flip opponents. Design a sturdy frame with reinforced armor in impact zones. Use high-traction wheels and a powerful drivetrain. Consider weapon systems that can grapple or immobilize. Balance weight distribution and keep the CoG low for stability.
What programming languages are best for controlling wrestling robots?
Answer:
For autonomous or semi-autonomous control, C++ and Python are popular due to their compatibility with microcontrollers like Arduino and Raspberry Pi. Arduino IDE uses C/C++ and is beginner-friendly. Python is excellent for advanced control on Raspberry Pi platforms. Many builders use a combination of manual radio control and programmed behaviors.
Where can I find affordable materials for building a battle robot?
Answer:
Industrial suppliers like McMaster-Carr offer a wide range of materials with fast shipping. For budget-conscious builders, Harbor Freight and local hardware stores can supply basic tools and some materials. Online marketplaces like Amazon and Etsy also have parts and custom components. For metal fabrication, services like SendCutSend provide affordable laser cutting.
What safety features should I include in a robot designed for wrestling?
Answer:
- Remote kill switch: Instantly disables your robot
- Battery fusing and fireproof enclosures: Prevent battery fires
- Secure wiring: Avoid shorts and loose connections
- Armor: Protects electronics and motors
- Failsafe programming: Stops motors if signal is lost
- Emergency stop buttons: For manual intervention during testing
How do I join the official Robot Wrestling League with my own robot?
Answer:
Visit the Robot Wrestling League website to review the rules and registration process. You’ll need to submit your robot for inspection to ensure compliance with weight, safety, and design regulations. Attend local qualifiers or events to gain experience and rankings before entering major tournaments.
What are the most effective robot designs for winning wrestling matches?
Answer:
Effective designs vary, but common winning traits include:
- Low center of gravity for stability
- Powerful drivetrain with high traction wheels
- Robust armor protecting vital parts
- Weapon systems designed to immobilize or flip opponents
- Modular design for quick repairs
- Experienced driver or autonomous control for precision
📖 Reference Links and Further Reading
- Instructables: How to Design and Build a Combat Robot
- Facebook Group: Donating a Room for a Middle School Robotics Team
- Builders Database
- Robot Events
- Banebots Official Website
- Robot Marketplace
- McMaster-Carr
- Maxon Motors Official Site
- Spektrum RC
- Arduino Official Site
- Fusion 360 by Autodesk
Ready to build? The arena awaits your mechanical champion! 🏆