Support our educational content for free when you buy through links on our site. Learn more
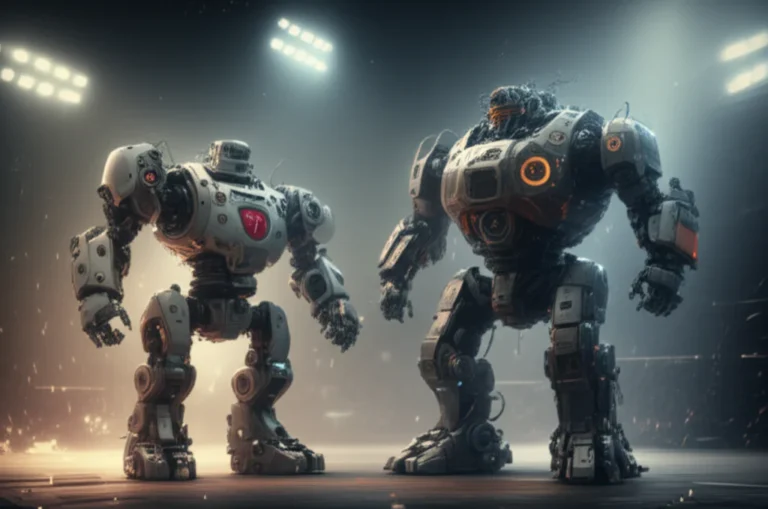
How Much Does It Cost to Build a Competitive Robot Wrestler? 🤖 (2025)
Ever wondered what it takes—both in skill and dollars—to build a robot that can throw down in the arena and actually win? At Robot Wrestling™, we’ve seen everything from budget-friendly Beetleweights to jaw-dropping Heavyweights that cost more than a used car. Spoiler alert: building a competitive robot wrestler isn’t just about slapping together parts; it’s a strategic investment in design, materials, and relentless testing.
In this comprehensive guide, we break down every cost factor—from motors and batteries to fabrication and maintenance—so you know exactly where your money goes. Curious how much a spinner weapon really costs? Or whether you should invest in titanium armor or stick with aluminum? We’ve got you covered. Plus, we share insider tips from champions and reveal common pitfalls that can drain your wallet fast. Ready to build your mechanical gladiator? Let’s dive in!
Key Takeaways
- Robot cost varies dramatically by weight class, with Heavyweights demanding the highest budgets and smaller classes offering more affordable entry points.
- Weapon systems and drivetrain components consume the largest portion of your budget, especially in bigger robots.
- Planning and design choices directly impact costs and competitive success—simplicity and maintainability often trump complexity.
- Ongoing maintenance and upgrades are essential and must be budgeted for, as robot wrestling is a sport of constant evolution.
- Access to tools and fabrication services can save or add thousands to your build cost—know your options before starting.
Ready to start shopping for motors, ESCs, and batteries? Check out our recommended suppliers and manufacturing services in the article to get the best bang for your buck!
Table of Contents
- ⚡️ Quick Tips and Facts About Building Competitive Robot Wrestlers
- 🤖 The Evolution of Robot Wrestling: A Brief History and Cost Overview
- 🎯 Setting Your Robot Wrestling Goals: What Defines “Competitive”?
- 💰 Budget Breakdown: How Much Does It Really Cost to Build a Competitive Robot Wrestler?
- 1️⃣ Choosing Your Robot’s Size and Weight Class: Impact on Cost and Performance
- 2️⃣ Research and Planning: Smart Strategies to Maximize Your Budget
- 3️⃣ Designing Your Robot: From Concept to Competitive Edge
- 4️⃣ Selecting High-Performance Components: Motors, Batteries, and Controllers
- 5️⃣ CAD Modeling and Simulation: Visualizing Your Robot Before Building
- 6️⃣ Fabrication and Manufacturing: Materials, Tools, and Outsourcing Options
- 7️⃣ Assembly and Integration: Bringing Your Robot to Life
- 8️⃣ Wiring, Electronics, and Control Systems: The Brain and Nerves of Your Robot
- 9️⃣ Testing and Fine-Tuning: Preparing for the Arena
- 🔟 Maintenance and Upgrades: Keeping Your Robot Competitive Season After Season
- 💡 Insider Tips from Robot Wrestling Champions: What We’ve Learned
- 🛠️ Common Pitfalls and How to Avoid Costly Mistakes
- 🤔 Is Building Your Own Robot Wrestler Worth It? Cost vs. Competition
- 🎉 Conclusion: Your Roadmap to Building a Winning Robot Wrestler
- 🔗 Recommended Links for Robot Wrestling Builders and Fans
- ❓ Frequently Asked Questions About Robot Wrestler Costs and Construction
- 📚 Reference Links and Resources for Deep Dive Research
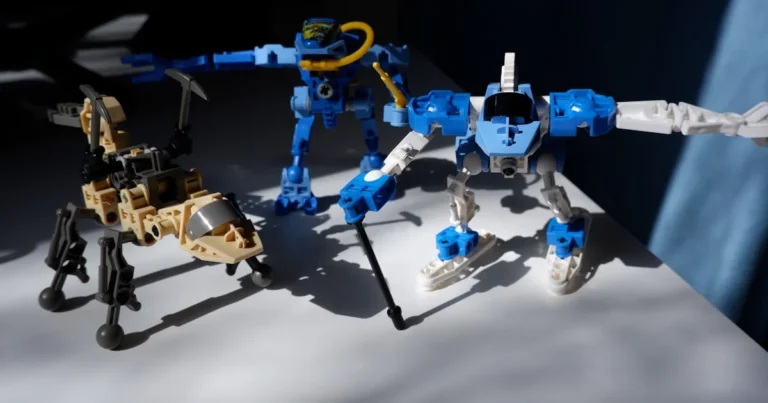
⚡️ Quick Tips and Facts About Building Competitive Robot Wrestlers
Welcome to the electrifying world of robot wrestling! You’re here because you’ve got that spark—the desire to build, to battle, and to dominate the arena. But before you start sketching your mechanical monster, let’s talk brass tacks. How much is this glorious obsession going to cost you? Here’s the lowdown from our team at Robot Wrestling™.
- 💰 Big Bots, Big Budgets: Don’t be fooled by the bright lights of TV. A competitive heavyweight robot (220 lbs) can easily set you back $4,000-$5,000 for an initial build. And that’s just the starting line. Many top-tier builders pour upwards of $15,000 or more into their machines over several years of upgrades and repairs.
- 🐜 Small but Mighty (and Pricey): Think a smaller Antweight (1 lb) or Beetleweight (3 lb) bot will be cheap? Think again! While the material costs are lower, the specialized, compact electronics required for these smaller classes can be surprisingly expensive, sometimes rivaling the cost of components for their larger cousins.
- ✅ Spares are NOT Optional: The first rule of robot wrestling? Things will break. A competitive budget must include funds for spare parts. We recommend at least two sets of batteries and a backup for every critical component, from motors to speed controllers.
- ⚖️ Weight Class is King: The single biggest factor determining your cost is the weight class you choose to compete in. We’ll dive deeper into this, but deciding on a class is your absolute first step.
- 🛠️ DIY vs. Pro Services: Your access to tools will heavily influence your budget. Got a fully equipped machine shop? You’ll save a ton on labor. Building with hand tools? You’ll save on equipment but might spend more on pre-fabricated parts from services like SendCutSend or Big Blue Saw.
- 🏆 “Competitive” is a Spectrum: Are you aiming to win your local hobbyist event or are you chasing the coveted “Golden Dumpster” at the National Havoc Robot League (NHRL)? Your ambition directly scales with your budget.
🤖 The Evolution of Robot Wrestling: A Brief History and Cost Overview

Remember the good old days when robot combat first burst onto our TV screens? It was a glorious spectacle of sparks and shredded metal that inspired a generation of builders. Back then, sponsorships were more plentiful, and a well-placed logo could help offset the staggering costs of building a heavyweight contender.
Fast forward to today. The sport has exploded, with leagues like the NHRL bringing robot fighting to a massive global audience online. This has created a vibrant, diverse community of makers and engineers. However, the financial landscape has shifted. While some top teams still land sponsorships, the modern builder is largely self-funded.
This shift has led to incredible innovation in cost-saving measures. Builders have become masters of sourcing surplus parts, modifying off-the-shelf components, and sharing open-source designs. The rise of more accessible manufacturing, like 3D printing and affordable CNC machining, has also been a game-changer. Yet, the fundamental truth remains: to be at the top, you have to be prepared to invest. This isn’t just a hobby; for many of us, it’s a passion project that blends engineering prowess with the heart of a warrior. You can find many of us sharing our latest builds and battle stories in our Behind the Scenes section.
🎯 Setting Your Robot Wrestling Goals: What Defines “Competitive”?
So, you want to build a “competitive” robot. What does that even mean? It’s a question we get all the time, and the answer is… it depends entirely on you.
Level 1: The Weekend Warrior
Your goal is to show up at a local event, have a blast, and maybe win a match or two. You want your robot to be reliable, functional, and not fall apart in the first 30 seconds.
- Focus: Durability, simplicity, and having fun.
- Budget: Lower end of the spectrum for your chosen weight class.
- Mindset: “Winning is great, but building the machine is 75%+ the fun of the project.”
Level 2: The Regional Contender
Now we’re talking! You’re aiming for the podium at regional events. You’re not just there to participate; you’re there to win. Your design needs to be robust, effective, and easily repairable between matches.
- Focus: Performance, efficiency, and maintainability. You should be able to swap a motor in 10-15 minutes flat.
- Budget: Mid-to-high range. You’re investing in higher-quality motors, electronics, and materials.
- Mindset: You study other robots, refine your Robot Design, and you’re always thinking about your next upgrade.
Level 3: The National Champion
This is the big league. You’re competing in major tournaments like the NHRL World Championship Finals. Your robot is a finely tuned machine, pushing the limits of engineering and design.
- Focus: Optimization, cutting-edge technology, and weight management down to the last gram.
- Budget: “Sky’s the limit” isn’t far off. You’re likely spending in the upper thousands, or even tens of thousands, on the best components money can buy.
- Mindset: This is a serious commitment of time, money, and energy. You live, breathe, and dream robot wrestling.
Before you buy a single screw, be honest with yourself about your goals. This decision will guide every single choice you make, especially your budget.
💰 Budget Breakdown: How Much Does It Really Cost to Build a Competitive Robot Wrestler?
Alright, let’s get into the nitty-gritty. While we can’t give you an exact price tag, we can show you where your money is likely to go. The cost distribution changes based on your robot’s design, but here’s a typical breakdown for a “spinner” type robot, one of the most common and effective designs.
| Component Category | Beetleweight (3 lbs) % of Budget | Featherweight (30 lbs) % of Budget | Heavyweight (220 lbs) % of Budget | Key Components & Considerations |
|---|---|---|---|---|
| Weapon System | 35% | 40% | 45% | Motor, custom-machined weapon bar/drum, bearings, belts. This is your primary damage dealer and a huge cost center. |
| Drivetrain | 25% | 20% | 20% | Drive motors, gearboxes, wheels, chains/belts. Reliability is key here! Brands like BaneBots are popular. |
| Electronics | 20% | 15% | 10% | Radio Receiver (Spektrum), Transmitter, Electronic Speed Controllers (ESCs), power switch. Costs don’t scale as dramatically as metal parts. |
| Frame & Armor | 15% | 20% | 20% | Materials like Aluminum, Titanium, or AR500 steel. Machining and fabrication costs can be significant. |
| Battery & Wiring | 5% | 5% | 5% | High-discharge LiPo batteries are the standard. Don’t cheap out on quality wire and connectors! |
Why the Percentage Shift?
Notice how the weapon system takes up a larger chunk of the budget as the robot gets bigger? That’s because the forces involved are exponentially higher. A heavyweight weapon motor is a beast, and a custom-machined 50lb bar of hardened steel is a serious investment. Conversely, electronics don’t scale in price as dramatically, making them a smaller percentage of a heavyweight’s massive budget.
1️⃣ Choosing Your Robot’s Size and Weight Class: Impact on Cost and Performance
This is your first, and most important, decision. As the Instructables guide wisely states, “what is the point of building a bot you can never fight.” You need to find competitions you can realistically travel to and see what weight classes they run. Resources like RobotEvents.com and the Builders Database are your best friends here.
Here’s a rundown of common weight classes and what they mean for your wallet:
| Weight Class | Weight Limit | Typical Cost Range (Competitive Build) | Our Expert Take 🤖 |
|---|---|---|---|
| Antweight | 1 pound (454 g) | Low to Moderate | Great entry point! Teaches the fundamentals of design and electronics. But don’t be fooled, top-tier Antweights are packed with expensive, tiny components. |
| Beetleweight | 3 pounds (1.36 kg) | Moderate | This is arguably the most popular class right now. A fantastic balance of destructive power and manageable cost. Events are plentiful, especially at NHRL. |
| Hobbyweight | 12 pounds (5.44 kg) | Moderate to High | A significant step up in power and cost. The forces involved are serious, requiring more robust materials and components. |
| Featherweight | 30 pounds (14 kg) | High | Now you’re in the big leagues. These are fast, powerful, and expensive machines. Expect to invest heavily in custom parts and powerful systems. |
| Heavyweight | 220 pounds (100 kg) | Very High to Astronomical | The titans of the sport. “When you commit to building a machine this size you are committing at least $1000, and in many cases much more.” We’d say that’s an understatement for a competitive build today! |
2️⃣ Research and Planning: Smart Strategies to Maximize Your Budget
“The main reason that setting a budget is important for your project is that you can very easily spend hundreds if not thousands of dollars very quickly.” We couldn’t have said it better ourselves. Planning is everything.
Know the Rules, Know the Arena
Before you even think about design, read the rulebook for the competition you’re targeting. Whether it’s the Robot Fighting League (RFL) or BattleBots itself, the rules dictate everything. Are there restrictions on weapon types? What are the safety requirements? Speaking of which, safety is paramount in this sport. We strongly recommend reading our detailed guide on What Safety Precautions Should I Take When Participating in Robot Wrestling? 🤖 (2025).
Component Shopping List
Make a detailed list of every single part you’ll need. This isn’t just a suggestion; it’s a necessity. Your list should include:
- ✅ Drivetrain (motors, gearboxes, wheels)
- ✅ Weapon System (motor, weapon, bearings)
- ✅ Electronics (radio system, ESCs, battery, switch)
- ✅ Materials (chassis, armor)
- ✅ Hardware (screws, nuts, bolts from a reliable source like McMaster-Carr)
- ✅ Spares! (Did we mention spares?)
Once you have your list, start “window shopping.” Price out each component from different vendors to build a realistic cost estimate. This exercise will undoubtedly lead to some tough choices, but it’s better to make them on paper than when your credit card is maxed out.
3️⃣ Designing Your Robot: From Concept to Competitive Edge
Here’s where the real fun begins! Your robot’s design is its soul. We always tell new builders to focus on two key things: uniqueness and maintainability.
Find Your “Wow Factor”
Do you want a devastating vertical spinner? A powerful flipper? A sturdy control bot? Look at what’s winning in our Famous Matches archive, but don’t just copy the champions. Ask yourself, “Is this robot unique from others? Does it have that wow factor…?” A unique design can give you a strategic advantage and, let’s be honest, it’s just cooler.
Design for a 10-Minute Fix
Your robot will take damage. The question is, how fast can you fix it? A brilliant design that takes two hours to disassemble is useless in a tournament setting where you might have less than 30 minutes between fights. Design for easy access to your internals. Can you swap out a drive motor or a battery quickly? If not, it’s time to go back to the drawing board. This is a core tenet of our Robot Design philosophy.
4️⃣ Selecting High-Performance Components: Motors, Batteries, and Controllers
Your robot is only as good as its weakest component. This is where a significant portion of your budget will go, and for good reason.
Motors: The Heart of the Beast
- Drive Motors: You need reliable torque and speed. In the smaller classes, builders often use high-performance brushless motors. For larger bots, modified drill motors (e.g., from Harbor Freight) and specialized combat robot motors from brands like BaneBots are common choices.
- Weapon Motors: This depends entirely on your weapon type. A high-speed brushless motor is perfect for a spinner, while a pneumatic or hydraulic system might power a flipper or crusher.
Batteries: Power is Everything
- Lithium Polymer (LiPo): This is the gold standard. LiPo batteries offer the best power-to-weight ratio, are increasingly affordable, and can deliver the massive current your motors crave.
- Nickel Cadmium (NiCad): A proven, durable, and relatively cheap option, often found in medium-sized bots.
- Sealed Lead Acid (SLA): Cheap and easy to find, but very heavy. Generally only used if you have a lot of weight to spare, which is rare.
Electronic Speed Controllers (ESCs): The Brains of the Brawn
The ESC translates signals from your radio receiver into power for the motors. You need one for each motor (or side of your drive). Crucially, the ESC’s voltage and amperage ratings must exceed your motor’s requirements. Skimping here is a recipe for a smoke-filled robot and a quick exit from the tournament. The price of an ESC directly correlates with how much power it can handle.
👉 Shop Robot Components on:
- Motors: Amazon | BaneBots Official Website
- ESCs: Amazon | HobbyKing
- LiPo Batteries: Amazon | HobbyKing
5️⃣ CAD Modeling and Simulation: Visualizing Your Robot Before Building
Want to avoid a costly mistake? Design your robot in Computer-Aided Design (CAD) software first. This is a non-negotiable step for any serious builder. Why?
- Fit and Finish: It allows you to assemble your robot virtually, ensuring all your custom-designed parts actually fit together.
- Weight Management: Modern CAD programs can assign material properties to your parts, giving you a remarkably accurate estimate of your robot’s final weight. This is critical for staying within your weight class.
- Problem Solving: You can identify potential issues, like a screw being inaccessible or a wire path being too tight, before you’ve spent a dime on materials.
“The most important thing about CAD design is that you have your dimensions right,” notes the Instructables guide. You don’t need to be a CAD wizard. Software like Autodesk Inventor (often available with a free student license) and Solidworks are more user-friendly than ever. For those who prefer a more hands-on approach, the “cardboard-aided design” method—building a full-scale model out of cardboard—is a time-honored and effective alternative.
6️⃣ Fabrication and Manufacturing: Materials, Tools, and Outsourcing Options
You’ve got a killer design. Now, how do you make it real? Your options range from basic hand tools to professional CNC services.
Choosing Your Materials
- Aluminum (6061-T6 & 7075): The workhorse of robot combat. 6061 is easier to machine and weld, while 7075 is tougher and offers better impact resistance.
- Titanium: The king of armor for its incredible strength-to-weight ratio. It’s also incredibly expensive and difficult to machine.
- UHMW Plastic: A durable and slick plastic, perfect for internal mounting components.
- Polycarbonate (Lexan): Great for top panels due to its impact resistance, but it can crack.
Manufacturing Methods
- DIY with Hand/Power Tools: The most budget-friendly option if you have the skills and patience. Accuracy is key—”measure twice, cut once” is your mantra.
- Machine Shop: Access to a manual mill and lathe gives you much higher precision for custom parts.
- Online Manufacturing Services: This is a game-changer. Services like SendCutSend and Big Blue Saw can waterjet or laser cut your parts directly from your CAD files with incredible accuracy. This is often the best choice for critical components like your chassis and weapon.
7️⃣ Assembly and Integration: Bringing Your Robot to Life
This is the moment of truth! All your planning, designing, and fabricating come together. Be prepared for things not to fit perfectly, especially if you made parts by hand. A little filing or drilling is often part of the process.
Our biggest piece of advice here: don’t cheap out on fasteners. Use high-quality, graded screws and bolts from an industrial supplier like McMaster-Carr. The extreme vibrations and impacts of combat will shake loose cheap hardware in seconds. Use threadlocker (like Loctite) on every screw that doesn’t need to be removed regularly.
This is also where you’ll appreciate a design built for maintainability. As you assemble, ask yourself: “If this wire breaks, how hard is it to replace?” If the answer is “a nightmare,” you might want to rethink your layout.
8️⃣ Wiring, Electronics, and Control Systems: The Brain and Nerves of Your Robot
Clean, secure wiring is the mark of a pro builder. A loose connection can cost you a match.
Radio Control Systems
Your radio transmitter and receiver are your link to the robot. While older FM systems exist, the modern standard is 2.4 GHz digital spread spectrum.
- Why 2.4 GHz? These systems, like the popular Spektrum D6, digitally “pair” your transmitter to your receiver, making them virtually immune to interference from other robots. This is a must-have for any serious competitor.
- Cost: A good radio system is an investment, but it’s one you can use for many robots for years to come.
Wiring Best Practices
- Use appropriate gauge wire: Thicker wire for high-current components like motors, thinner wire for signals.
- Protect your connections: Use heat shrink tubing on all solder joints.
- Secure everything: Tie down loose wires to prevent them from getting snagged or damaged during a match.
- Install a robust power switch: This is a critical safety feature and a requirement at all competitions.
👉 Shop Radio Control Systems on:
- Spektrum Transmitters: Amazon | Spektrum RC Official Website
- Receivers: Amazon | HobbyKing
9️⃣ Testing and Fine-Tuning: Preparing for the Arena
You wouldn’t run a marathon without training, so don’t enter a tournament without rigorous testing.
- Test Subsystems First: Power up your drive system and weapon system independently before integrating everything.
- Practice, Practice, Practice: Driving a combat robot is a skill. Get a feel for how your bot handles, how it turns, and how it accelerates.
- Break It In: Run your mechanical systems to “break them in” and identify any potential failure points before you’re in a real match.
- Iterate and Improve: “Design is an iterative process. You will never get it right the first time but with testing and modifications you can make it work.” Your first test will reveal flaws. That’s not a failure; it’s a valuable learning experience. Tweak, adjust, and make it better.
🔟 Maintenance and Upgrades: Keeping Your Robot Competitive Season After Season
The cost of your robot doesn’t end after the first build. Maintenance and upgrades are an ongoing expense that you must factor into your long-term budget.
- Post-Fight Checklist: After every match, you should have a checklist to run through: check for bent parts, loose screws, damaged wires, and battery health.
- Investing in Upgrades: As you compete, you’ll identify your robot’s weaknesses. Maybe your armor gets dented too easily, or your weapon motor isn’t powerful enough. This is where the long-term cost comes in. Successful builders are constantly reinvesting in their machines, upgrading materials, and refining their designs. This is how a $5,000 heavyweight can evolve into a $15,000 champion over several seasons.
💡 Insider Tips from Robot Wrestling Champions: What We’ve Learned
After countless hours in the workshop and the arena, we’ve learned a few things the hard way. Here are some golden nuggets from the Robot Wrestling™ team:
- Weight is a Resource, Not a Limit: Don’t just aim to be under the weight limit. Aim to be at the weight limit. Every unused gram is wasted potential for thicker armor, a bigger weapon, or a more powerful motor.
- The “KISS” Principle: Keep It Simple, Stupid. A complex, delicate mechanism is often the first thing to fail. A simple, robust design will win more fights than a complicated one that only works 50% of the time.
- Learn from Your Losses: Some of our team’s best design breakthroughs have come directly after a devastating loss. Don’t get discouraged. Analyze the wreckage, understand why you lost, and build it back stronger. Check out our Opinion Pieces for some epic comeback stories.
🛠️ Common Pitfalls and How to Avoid Costly Mistakes
We’ve seen promising robots fail for the silliest reasons. Avoid these common and costly mistakes:
- ❌ Ignoring the “Center of Gravity”: A high center of gravity makes your robot easy to tip over. Keep your heavy components (motors, batteries, weapon) as low to the ground as possible.
- ❌ Exposed Wheels: Unprotected wheels are a massive target. A good opponent will disable your mobility in seconds if your wheels are exposed. Design your frame to protect them.
- ❌ Poor Power-to-Weight Ratio: Don’t just focus on a big weapon. If your drivetrain is underpowered, you’ll be a sitting duck. A fast, agile robot can often outmaneuver a more powerful but slower opponent.
- ❌ Forgetting the Power Switch: It sounds basic, but fumbling for a poorly placed power switch can be a nightmare. Make sure it’s easily accessible but also protected from accidental impacts.
🤔 Is Building Your Own Robot Wrestler Worth It? Cost vs. Competition
So, after all this talk of budgets in the thousands and countless hours of work, is it worth it?
Absolutely, 100% yes!
Building a competitive robot wrestler is one of the most rewarding challenges you can undertake. It’s a fusion of art and science, creativity and raw power. You’ll learn about engineering, design, electronics, and fabrication. You’ll join an incredible community of passionate builders who are always willing to lend a hand or share advice.
And the feeling of seeing something you built with your own two hands come to life in the arena? It’s indescribable. Win or lose, the journey is the real prize. As the old saying in the pits goes, “remember that it isn’t necessary that you win every match or event as building the machine is 75%+ the fun of the project.” You’re not just building a robot; you’re building skills, friendships, and memories that will last a lifetime. Ready to see what the competition looks like? Check out our Event Announcements to find a battle near you
🎉 Conclusion: Your Roadmap to Building a Winning Robot Wrestler

So, how much does it cost to build a competitive robot wrestler? The answer is as dynamic as the sport itself. From a modest Beetleweight to a fearsome Heavyweight contender, your budget will range from a few hundred dollars to tens of thousands — depending on your ambition, design, and dedication.
Here’s the bottom line: Building a competitive robot wrestler is a thrilling, challenging, and rewarding endeavor that demands careful planning, smart budgeting, and a willingness to learn from every bump and blow. Whether you’re a weekend warrior or a national champion in the making, the key is to set clear goals, choose your weight class wisely, and invest in quality components that balance performance and reliability.
Remember our earlier question: Is building your own robot wrestler worth it? Absolutely! The journey of designing, fabricating, and battling your own creation is a unique blend of engineering mastery and pure adrenaline. Plus, the community and camaraderie you’ll find in the pits are priceless.
If you’re ready to jump in, start small, plan meticulously, and embrace the iterative process. Your robot might not win every match, but the experience and skills you gain will be your true victory.
🔗 Recommended Links for Robot Wrestling Builders and Fans
Ready to gear up? Here are some top resources and product links to kickstart your robot wrestling journey:
-
Motors & Drivetrain Components:
-
Electronic Speed Controllers (ESCs):
-
Radio Control Systems:
-
Batteries:
-
Manufacturing Services:
-
Hardware & Fasteners:
-
Books to Deepen Your Knowledge:
- Robot Builder’s Bonanza by Gordon McComb: Amazon Link
- Make: Combat Robots by Mark Setrakian: Amazon Link
❓ Frequently Asked Questions About Robot Wrestler Costs and Construction
What materials are needed to build a competitive robot wrestler?
Building a competitive robot wrestler requires a mix of metals and plastics tailored to your design and weight class. Common materials include:
- Aluminum (6061-T6 and 7075): Lightweight and machinable, ideal for chassis and armor.
- Titanium: Extremely strong and lightweight but costly and difficult to machine; used for high-end armor.
- Polycarbonate (Lexan): Used for impact-resistant panels and top covers.
- UHMW Plastic: Durable for internal mounts and shock absorption.
- Steel (AR500 or similar): Sometimes used for armor in heavier classes due to its toughness.
Choosing the right materials balances weight, cost, and durability. For example, a Beetleweight builder might favor aluminum and polycarbonate to keep weight down, while a Heavyweight might invest in titanium armor for maximum protection.
How long does it take to build a robot for the Robot Wrestling League?
The build time varies widely depending on your experience, tools, and complexity of the design:
- Beginner Builders: Expect 3-6 months from concept to competition-ready robot, including learning curves in CAD, fabrication, and electronics.
- Experienced Builders: With access to machining tools and prior designs, 1-3 months is typical.
- Iterative Improvements: Many builders continue upgrading and tweaking their robots season after season.
Patience is key. Rushing can lead to costly mistakes and unreliable robots.
What are the average maintenance costs for a robot wrestler?
Maintenance costs depend on your competition frequency and robot design but generally include:
- Spare Parts: Motors, ESCs, batteries, and weapon components often need replacement after heavy use.
- Hardware: Screws, fasteners, and wiring require regular inspection and replacement.
- Upgrades: Investing in better armor or electronics to stay competitive.
On average, expect to spend 10-20% of your initial build cost annually on maintenance and upgrades. Planning for this ongoing expense is crucial.
How do design choices affect the cost of a robot wrestler?
Design decisions have a profound impact on cost:
- Weapon Type: Spinners require powerful motors and precision machining, increasing costs. Flippers may need pneumatic systems, adding complexity and expense.
- Materials: Using titanium armor versus aluminum can multiply costs.
- Complexity: More moving parts and custom components increase fabrication time and price.
- Maintainability: Designs that allow quick repairs may require modular parts, which can cost more upfront but save money long-term.
Balancing ambition with budget is an art form in itself.
Are there budget-friendly options for building a robot wrestler?
✅ Absolutely! Many builders start with:
- Smaller Weight Classes: Antweight and Beetleweight classes require fewer materials and less powerful (thus cheaper) components.
- Repurposed Parts: Using surplus motors, batteries, and electronics from hobby stores or previous projects.
- DIY Fabrication: Hand tools and 3D printing can reduce costs compared to professional machining.
- Open-Source Designs: Leveraging community-shared plans and advice.
However, budget-friendly doesn’t mean cheap. Quality components and safety should never be compromised.
What are the most expensive components in a robot wrestling build?
Typically, the costliest parts are:
- Weapon Systems: Custom-machined weapon bars, high-torque motors, and bearings.
- Drive Motors and Gearboxes: High-performance motors and durable gearboxes add up quickly.
- Armor Materials: Titanium and hardened steel armor plates are costly but essential for survival.
- Electronics: High-quality ESCs and radio systems, especially digital 2.4 GHz setups.
How can I reduce costs when building a robot for robot battles?
Here are some pro tips to keep your budget in check:
- Plan Meticulously: Avoid last-minute purchases and design changes.
- Buy Used or Surplus: Look for second-hand motors and batteries in good condition.
- Start Small: Build a smaller robot first to learn the ropes before scaling up.
- Use Online Manufacturing Wisely: Services like SendCutSend offer affordable precision parts without investing in expensive tools.
- Join the Community: Forums and local clubs often share parts and advice that can save you money.
📚 Reference Links and Resources for Deep Dive Research
- Instructables: How to Design and Build a Combat Robot — Comprehensive guide with cost insights.
- National Havoc Robot League (NHRL) — Premier robot fighting league with resources and events.
- Robot Fighting League (RFL) — Official rules and competition info.
- BattleBots Official Website — The biggest televised robot combat competition.
- SendCutSend — Affordable online CNC and waterjet cutting service.
- Big Blue Saw — Online custom metal cutting service.
- McMaster-Carr — Industrial-grade hardware and fasteners.
- Spektrum RC — Industry-leading radio control systems.
- BaneBots — Popular motors and drivetrain components for combat robots.
- Sumo – Wikipedia — For background on traditional wrestling and its cultural significance.
Ready to build your champion? Dive into our Robot Design articles and join the conversation in the pits!