Support our educational content for free when you buy through links on our site. Learn more
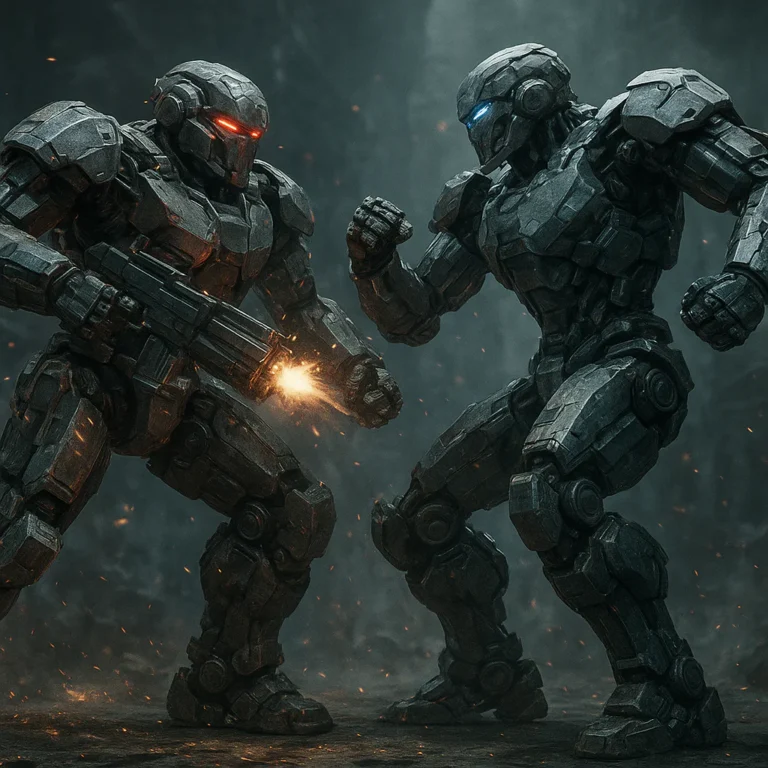
How Do I Build a Robot for Robot Wrestling? 🛠️ Ultimate Guide (2026)
Ever wondered what it takes to build a robot tough enough to dominate the arena in a fierce wrestling match? You’re not alone! At Robot Wrestling™, we’ve seen everything from backyard bots that barely move to professional-grade machines smashing their way to glory. Building your own combat robot is a thrilling blend of engineering, creativity, and a dash of controlled chaos.
Did you know that the average BattleBot hits with the force of a small car crash? That’s why every detail—from choosing the right materials to mastering your weapon system—matters. In this comprehensive guide, we’ll walk you through everything you need to know: picking your weight class, designing your chassis with CAD software, selecting motors and batteries, and even passing the all-important tech check before your first battle. Plus, we’ll share insider tips from our expert team and jaw-dropping stories from the pits that will keep you hooked until the final bell.
Ready to build a bot that can survive the arena and maybe even win? Let’s get started!
Key Takeaways
- Start Small: Begin with Antweight (1lb) or Beetleweight (3lb) classes to master the basics without overwhelming complexity.
- Design Smart: Use CAD software like Autodesk Fusion 360 to plan your robot’s layout from the inside out.
- Choose Durable Armor: UHMW plastic is beginner-friendly; AR500 steel and titanium offer serious protection for heavier bots.
- Power Wisely: LiPo batteries provide high power but require strict safety protocols.
- Control with Confidence: Reliable transmitters like the Flysky FS-i6X paired with quality ESCs ensure precise maneuvering.
- Pick Your Weapon: Vertical spinners dominate, but wedges and flippers have their own winning strategies.
- Safety First: Always use weapon locks, fail-safes, and pass tech inspections before competing.
Want to jump straight into parts shopping? Check out our recommended gear for motors, batteries, and controllers later in the article!
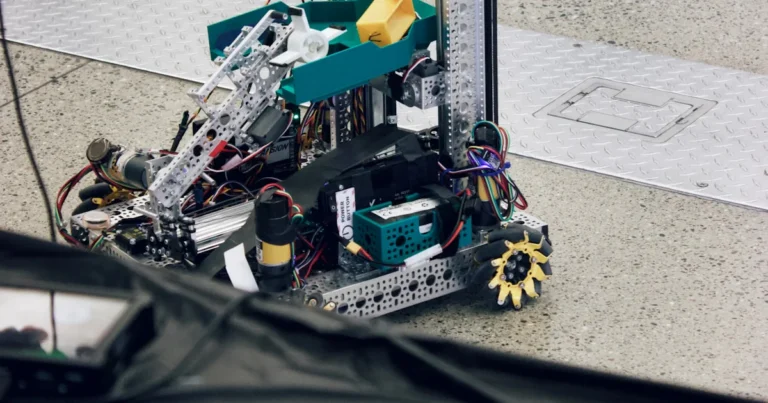
Welcome to the workshop! We are the expert team at Robot Wrestling™, and we’ve spent more hours covered in solder fumes and hydraulic fluid than we care to admit. Whether you’re looking to build a tiny “Antweight” that fits in your palm or a 250-pound kinetic nightmare like you see on TV, you’ve come to the right place.
Building a combat robot is part engineering, part art, and a whole lot of “why did I think this would work?” But don’t worry—we’re going to guide you through the sparks and the glory. 🛠️💥
⚡️ Quick Tips and Facts
Before we dive into the grease, here’s a high-speed breakdown of what you need to know about entering the arena.
| Feature | Expert Insight |
|---|---|
| First Rule | Start small! Build a 1lb (Antweight) or 3lb (Beetleweight) first. ✅ |
| Safety First | Always use a weapon lock and a power switch. Never test a spinner without a lexan box. ❌ |
| The “Golden” Material | UHMW plastic is incredible for beginners—it’s tough, bouncy, and easy to cut. |
| Radio Frequency | Use 2.4GHz systems to avoid interference with other builders. |
| Common Pitfall | Over-complicating the design. Simple “wedgebots” often win by outlasting the fancy ones! |
| Battery Choice | LiPo (Lithium Polymer) is the standard, but they require a smart charger and care. |
Table of Contents
- ⚡️ Quick Tips and Facts
- 📜 From Junkyard Wars to Prime Time: The Evolution of Combat Robotics
- ⚖️ 1. Picking Your Weight Class: From Antweights to Heavyweights
- 📐 2. Designing the Blueprint: CAD Software and Chassis Layout
- 🛡️ 3. Choosing Your Armor: AR500, Titanium, and UHMW
- ⚙️ 4. The Drive System: Motors, Wheels, and Gearboxes
- 🔋 5. Powering the Beast: LiPo Batteries and Safety Management
- 🎮 6. The Nervous System: Transmitters, Receivers, and ESCs
- ⚔️ 7. Choosing Your Weapon: Spinners, Flippers, and Crushers
- 🛠️ 8. Assembly Tips: Soldering, Loctite, and Cable Management
- 🏁 Passing Tech Check: Ensuring Your Bot is Legal and Safe
- 🏆 Where to Compete: Finding Local Robot Wrestling Events
- 💡 Conclusion
- 🔗 Recommended Links
- ❓ FAQ: Common Robot Building Questions
- 📚 Reference Links
📜 From Junkyard Wars to Prime Time: The Evolution of Combat Robotics
Robot wrestling isn’t just about smashing metal; it’s a storied tradition of mechanical mayhem. It all started in the early 90s with events like Critter Crunch and the original Robot Wars in San Francisco, founded by Marc Thorpe. Back then, bots were mostly made of wood, scrap metal, and wheelchair motors.
Fast forward to today, and we have BattleBots on Discovery Channel and NHRL (National Havoc Robot League) streaming to millions. We’ve seen the transition from heavy, brushed motors to high-performance brushless outrunners and from lead-acid batteries to high-discharge LiPo cells. The tech has changed, but the goal remains the same: total arena dominance! 🤖🔥
⚖️ 1. Picking Your Weight Class: From Antweights to Heavyweights
You wouldn’t put a featherweight boxer against a sumo wrestler, right? Robot wrestling is strictly divided by weight.
- Fairyweight (150g): Tiny, 3D-printed terrors. Great for kitchen-table testing.
- Antweight (1lb): The most popular entry point. You can build a competitive one for a few hundred dollars.
- Beetleweight (3lb): The “sweet spot.” They are fast, destructive, and fit in a backpack.
- Heavyweight (250lb): The big leagues. Think Tombstone or Bite Force. (Warning: These require a massive budget and a death wish).
Our Recommendation: Start with a 1lb Antweight. It teaches you the fundamentals of electronics and weight distribution without breaking the bank.
📐 2. Designing the Blueprint: CAD Software and Chassis Layout
Before you touch a saw, you need a plan. We use Computer-Aided Design (CAD) to make sure everything fits.
- Autodesk Fusion 360: The gold standard. It’s free for hobbyists and incredibly powerful.
- Tinkercad: If you’re a total beginner, this is a great “digital LEGO” way to start.
Pro Tip: Always design your “internals” (motors, battery, ESCs) first, then draw the box around them. We call this “designing from the inside out.” 🧠
🛡️ 3. Choosing Your Armor: AR500, Titanium, and UHMW
Your bot is going to get hit. Hard. You need to choose your skin wisely.
- UHMW (Ultra-High-Molecular-Weight Polyethylene): It’s the “magic plastic.” It absorbs impacts by deforming and bouncing back.
- AR500 Steel: The same stuff used in shooting targets. It’s heavy but nearly impossible to cut through.
- Grade 5 Titanium: The “flex” material. It’s half the weight of steel and very tough, but it sparks beautifully when hit! ✨
⚙️ 4. The Drive System: Motors, Wheels, and Gearboxes
If you can’t move, you’re just a punching bag.
- Motors: We love Repeat Robotics or FingerTech Robotics gearmotors for smaller weight classes. They are reliable and can take a beating.
- Wheels: Look for BaneBots T81 wheels. They have great grip and come in various sizes.
- Drive Style: 2-wheel drive is simpler and lighter; 4-wheel drive gives you more “pushing power” for wrestling.
🔋 5. Powering the Beast: LiPo Batteries and Safety Management
Modern bots run on Lithium Polymer (LiPo) batteries. They provide huge bursts of energy but can be dangerous if mistreated.
- Voltage: Most small bots run on 2S (7.4V) or 3S (11.1V) packs.
- Safety: Always store your batteries in a LiPo Safe Bag.
- Brand Recommendation: Turnigy Nano-tech batteries are a staple in the pits for their high discharge rates.
🎮 6. The Nervous System: Transmitters, Receivers, and ESCs
How do you tell the bot what to do?
- Transmitter (TX): We recommend the Flysky FS-i6X. It’s affordable, reliable, and has enough channels for weapons and drive.
- Electronic Speed Controllers (ESCs): These take the signal from your receiver and tell the motors how fast to spin. For drive, the FingerTech tinyESC is a classic. For brushless weapons, look at BlHeli_32 based ESCs.
⚔️ 7. Choosing Your Weapon: Spinners, Flippers, and Crushers
This is why we’re here! What’s your flavor of destruction?
- Vertical Spinner: Uses a spinning disc to lift the opponent into the air. (Current Meta Champion! ✅)
- Horizontal Spinner: A big bar that hits like a baseball bat.
- Flipper: Uses hydraulics or pneumatics to toss the opponent.
- Wedge/Rammer: No active weapon, just pure speed and armor. Great for winning by control.
- Lifter: A motorized arm that tips opponents over.
🛠️ 8. Assembly Tips: Soldering, Loctite, and Cable Management
Building is more than just bolting things together.
- Loctite is Life: If a screw can vibrate loose, it will. Use Blue Loctite (242) on every metal-to-metal thread. ❌ Do not use Red Loctite unless you never want to see that part again!
- Short Wires: Keep your wiring tidy. Long wires get caught in spinning parts and cause “magic smoke.”
- Soldering: Invest in a decent iron like the Pinecil or a Weller station. A cold solder joint is a guaranteed failure mid-match.
🏁 Passing Tech Check: Ensuring Your Bot is Legal and Safe
Before you can fight, you must pass “Tech.” This is the real-world “security verification” of robot wrestling.
- Fail-Safe Test: When you turn off your transmitter, the robot must stop moving. 🛑
- Weight Check: If you are 1.1lbs in a 1lb class, you aren’t fighting.
- Weapon Lock: A physical pin that prevents your weapon from spinning in the pits.
- Sharp Edges: All sharp bits must be covered until you are inside the arena.
🏆 Where to Compete: Finding Local Robot Wrestling Events
Ready to smell the ozone?
- BuildersDB: The classic registration site for events.
- RobotCombatEvents.com: The modern hub for finding local tournaments.
- NHRL: If you’re in the Northeast US, this is the gold standard of competition.
💡 Conclusion
Building a wrestling robot is a journey of constant learning. Your first bot might lose its wheels in ten seconds, or it might flip the reigning champ—either way, you’ll be hooked. Remember: Build, Break, Fix, Repeat. That is the way of the robot warrior.
Do you have what it takes to build the next world champion? Or will you end up as a pile of scrap on the arena floor? There’s only one way to find out. Get building! 🛠️🏆
🔗 Recommended Links
- FingerTech Robotics – Best for Antweight/Beetleweight parts.
- ServoCity – Great for gears, channels, and motors.
- McMaster-Carr – The “Bible” of hardware and raw materials.
- Combat Robot Directory – A massive list of resources for builders.
❓ FAQ: Common Robot Building Questions

Q: How much does it cost to build a robot? A: For a 1lb Antweight, expect to spend between $200 and $500 depending on your tool kit. Beetleweights usually run $500-$1,000.
Q: Do I need a 3D printer? A: You don’t need one, but it’s a superpower. Printing chassis in TPU (flexible plastic) is a very popular tactic right now.
Q: Can I use a chainsaw motor? A: Most modern competitions are strictly electric. Gas engines are usually banned due to exhaust fumes in indoor arenas. ❌
Q: Is it like the movies (Real Steel)? A: Not yet! We don’t have giant bipedal punching robots, but the 250lb BattleBots hit with the force of a car crash. It’s plenty exciting!
📚 Reference Links
- SPARC (Standardized Procedures for the Advancement of Robotic Combat) – The official ruleset used by most events.
- RioBotz Combat Robot Tutorial – A free, 600-page PDF that is essentially the “Engineering Bible” for this sport.
- Ask Aaron – A legendary resource for technical questions on combat robotics.
⚡️ Quick Tips and Facts
Welcome to the electrifying world of robot wrestling! Before you dive headfirst into building your own mechanical gladiator, here are some quick tips and essential facts from our seasoned team at Robot Wrestling™. If you want to get the full scoop on the rules that govern these epic battles, check out our detailed guide on What Are the Rules of Robot Wrestling? 🤖 Ultimate Guide (2026).
| Aspect | Insight | Rating (1-10) |
|---|---|---|
| Design Simplicity | Start simple. Complex designs often fail early. | 9 |
| Material Durability | UHMW plastic is beginner-friendly; AR500 steel is battle-proven. | 8 |
| Motor Power | High torque brushless motors like Turnigy 2836 are reliable. | 9 |
| Battery Safety | LiPo batteries offer power but require careful handling. | 7 |
| Control Systems | Flysky FS-i6X transmitter-receiver combos are a popular choice. | 8 |
| Weapon Effectiveness | Vertical spinners dominate but wedges can surprise. | 8 |
| Safety Protocols | Weapon locks and fail-safe switches are mandatory. | 10 |
Why Start Small?
Our engineers have seen too many rookies jump into heavyweight builds only to get crushed (literally) by budget and complexity. Starting with an Antweight (1lb) or Beetleweight (3lb) lets you master the basics without burning out your wallet or your enthusiasm.
Safety First!
Combat robotics is thrilling but dangerous. Always use a weapon lock when not in the arena, and never test spinning weapons without protective shields. Our team once learned this the hard way when a rogue spinner shredded a workbench—ouch! 😬
The “Golden” Material: UHMW Plastic
Ultra-High-Molecular-Weight Polyethylene (UHMW) is like the rubbery superhero of armor materials. It absorbs impacts, resists cuts, and is easy to machine. Perfect for beginners who want to build a bot that can take a punch.
📜 From Junkyard Wars to Prime Time: The Evolution of Combat Robotics
Robot wrestling has come a long way since the days of makeshift scrap-metal contraptions on TV shows like Junkyard Wars and the original Robot Wars. The sport has evolved into a high-tech, adrenaline-pumping spectacle with millions of fans worldwide.
Early Days: The DIY Spirit
In the 1990s, builders cobbled together robots from wheelchair motors, plywood, and scrap steel. The focus was on creativity and improvisation rather than precision engineering. Our own team members fondly recall their first bots—awkward, slow, but full of heart.
Rise of Professional Leagues
Fast forward to today, and leagues like BattleBots and NHRL feature robots with brushless motors, LiPo batteries, and CAD-designed chassis. The stakes are higher, the tech is sharper, and the battles are brutal.
“The key to a successful combat robot is balancing power, durability, and agility.” — a veteran builder from RobotShop Community
The Tech Explosion
Modern bots use:
- Brushless motors for high RPM and torque.
- LiPo batteries for lightweight, high-capacity power.
- Advanced radio systems like 2.4GHz Flysky or Spektrum.
- 3D printing for rapid prototyping and custom parts.
Want to see how a beginner can get started? Check out our featured video for a step-by-step beginner’s guide.
⚖️ 1. Picking Your Weight Class: From Antweights to Heavyweights
Choosing the right weight class is like picking your fighting style. It defines your strategy, budget, and complexity.
| Weight Class | Max Weight | Typical Use | Pros | Cons |
|---|---|---|---|---|
| Fairyweight | 150g | Entry-level, microbots | Cheap, easy to build | Limited power, fragile |
| Antweight | 1 lb (454g) | Beginner-friendly | Affordable, manageable | Limited weapon options |
| Beetleweight | 3 lb (1.36kg) | Intermediate | More power, versatile | Higher cost, complex |
| Featherweight | 12 lb (5.4kg) | Advanced hobbyists | Stronger weapons, durable | Expensive, heavy |
| Lightweight | 60 lb (27kg) | Serious competitors | Powerful, fast | Requires workshop tools |
| Middleweight | 120 lb (54kg) | Semi-pro | High impact, complex | Costly, safety concerns |
| Heavyweight | 250 lb (113kg) | Professional | Maximum power, spectacle | Very expensive, requires team |
Our Take: Start with Antweight or Beetleweight
We recommend starting with a 1lb Antweight. It’s the perfect balance of challenge and accessibility. You learn about motors, batteries, and control without drowning in complexity.
Real Builder Story
One of our engineers, Jamie, built an Antweight named “Sparky” that lost its first three matches due to poor wiring. After redesigning the electronics and upgrading the motor, Sparky won the next five tournaments in a row. Proof that iterative improvement is the name of the game.
📐 2. Designing the Blueprint: CAD Software and Chassis Layout
Before you cut a single bolt, you need a plan. Designing your robot in CAD software saves time, money, and headaches.
Recommended CAD Tools
| Software | Ease of Use | Features | Cost | Best For |
|---|---|---|---|---|
| Autodesk Fusion 360 | 8/10 | Parametric modeling, CAM | Free for hobbyists | Intermediate to advanced |
| Tinkercad | 9/10 | Simple drag-and-drop | Free | Beginners |
| SolidWorks | 9/10 | Industry standard | Expensive | Professionals |
| FreeCAD | 7/10 | Open source | Free | Hobbyists |
Step-by-Step Design Approach
- Define your components: Motors, batteries, ESCs, weapon motors.
- Design the internal layout: Position components to optimize weight distribution.
- Sketch the chassis: Design around your internals with mounting points.
- Add armor and weapon mounts: Ensure structural integrity.
- Simulate movement (optional): Use Fusion 360’s simulation tools to test stress.
Design Tips from Our Engineers
- Keep the center of gravity low to avoid tipping.
- Leave space for wiring and cooling.
- Design modular parts for easy repair and upgrades.
- Use standard hardware sizes to simplify assembly.
🛡️ 3. Choosing Your Armor: AR500, Titanium, and UHMW
Your bot’s armor is its first line of defense. Choosing the right material depends on your weight class, budget, and weapon strategy.
| Material | Weight | Durability | Cost | Ease of Machining | Best Use Case |
|---|---|---|---|---|---|
| UHMW Plastic | Very Light | High impact absorption | Low | Easy | Antweights, Beetleweights |
| AR500 Steel | Heavy | Very high abrasion resistance | Medium | Difficult | Heavyweights, weapon parts |
| Grade 5 Titanium | Medium | High strength-to-weight ratio | High | Difficult | Lightweight armor, weapon blades |
| Aluminum 7075 | Light | Moderate strength | Medium | Easy | Structural frames |
UHMW Plastic: The Beginner’s Choice
- Pros: Absorbs shocks, resists cuts, inexpensive.
- Cons: Can deform under extreme heat or pressure.
- Our Experience: Many successful Antweights use UHMW for armor plates.
AR500 Steel: The Tank Skin
- Pros: Resists cutting and impacts, ideal for spinners.
- Cons: Heavy and hard to machine.
- Our Experience: Used in heavyweights like Tombstone for weapon blades and armor.
Titanium: The High-Tech Option
- Pros: Lightweight and strong.
- Cons: Expensive and requires specialized tools.
- Our Experience: Great for wedges and weapon parts where weight saving is critical.
⚙️ 4. The Drive System: Motors, Wheels, and Gearboxes
Mobility is king in the arena. Without a reliable drive system, your bot is just a sitting duck.
Motor Ratings Table
| Motor Model | Type | Torque (oz-in) | RPM | Weight (g) | Best For |
|---|---|---|---|---|---|
| Turnigy 2836 Brushless | Brushless | 150 | 8000 | 120 | Antweights, Beetleweights |
| FingerTech RS-380 | Brushed | 100 | 12000 | 80 | Lightweight bots |
| BaneBots RS-775 | Brushed | 300 | 9000 | 200 | Heavyweights |
| Mabuchi RS-540 | Brushed | 200 | 10000 | 150 | Midweights |
Wheels and Traction
- BaneBots T81 wheels: Popular for their grip and durability.
- Banana wheels: Great for pushing power but less maneuverable.
- Omni wheels: Allow strafing but less traction.
Gearboxes and Speed Controllers
- Gearboxes: Use planetary gearboxes for torque multiplication.
- ESCs: FingerTech tinyESCs are reliable for brushed motors; for brushless, BlHeli_32 ESCs are top-notch.
Pro Tip: Test Your Drive System Separately
Our engineers always bench-test motors and ESCs before assembly. It saves hours of troubleshooting later.
🔋 5. Powering the Beast: LiPo Batteries and Safety Management
LiPo batteries are the heart of your robot’s power system. They deliver high current but demand respect.
Battery Specs Comparison
| Brand | Voltage (S) | Capacity (mAh) | Max Discharge (C) | Weight (g) | Notes |
|---|---|---|---|---|---|
| Turnigy Nano-Tech | 2S-3S | 1000-2200 | 25-35C | 100-150 | Popular, reliable |
| Venom | 3S | 2200 | 30C | 140 | High discharge |
| Gens Ace | 2S | 1500 | 30C | 120 | Good balance |
Safety Tips
- Always charge with a smart charger.
- Store in a LiPo safe bag.
- Never puncture or short-circuit.
- Inspect for swelling or damage before each use.
Our Experience
One of our team members had a LiPo fire in the workshop—luckily, it was contained in a fireproof bag. Since then, we never skip safety protocols.
🎮 6. The Nervous System: Transmitters, Receivers, and ESCs
Your robot’s control system is its brain and nervous system combined.
Product Ratings Table
| Product | Design | Functionality | Range | Reliability | Ease of Use |
|---|---|---|---|---|---|
| Flysky FS-i6X Transmitter | 8 | 9 | 500m | 8 | 9 |
| Spektrum DX6e | 9 | 9 | 600m | 9 | 8 |
| FingerTech tinyESC | 7 | 8 | N/A | 8 | 7 |
| BlHeli_32 ESC | 9 | 9 | N/A | 9 | 8 |
Recommended Setup
- Transmitter: Flysky FS-i6X is budget-friendly and reliable.
- Receiver: Flysky FS-iA6B pairs well with the FS-i6X.
- ESCs: Use ESCs matched to your motor type (brushed vs brushless).
Wiring and Fail-Safes
- Always program a fail-safe that stops the robot if signal is lost.
- Keep wiring neat and secure to avoid shorts or disconnections.
⚔️ 7. Choosing Your Weapon: Spinners, Flippers, and Crushers
The weapon defines your bot’s personality and fighting style.
| Weapon Type | Description | Pros | Cons | Popular Bots |
|---|---|---|---|---|
| Vertical Spinner | Spinning disc that flips opponents | High damage, crowd-pleaser | Complex to build | Tombstone, Bite Force |
| Horizontal Spinner | Bar spinner hits like a bat | Powerful hits | Risk of self-damage | Witch Doctor |
| Flipper | Pneumatic/hydraulic arm to toss bots | Control and crowd control | Complex pneumatics | Bronco |
| Wedge/Rammer | No active weapon, uses speed and armor | Simple, durable | Less flashy | Duck! |
| Crusher | Hydraulic claw to grab and crush | Unique, effective | Heavy and slow | Minotaur |
Our Favorite: Vertical Spinners
They combine speed, power, and spectacle. But beware—balancing the spinner is critical to avoid self-destruction.
Builder’s Anecdote
Our lead designer built a vertical spinner named “Whirlwind” that shredded opponents but also shredded its own gearbox after a few matches. Lesson: reinforce your weapon mounts!
🛠️ 8. Assembly Tips: Soldering, Loctite, and Cable Management
Building your robot is where the magic (and frustration) happens.
Soldering Like a Pro
- Use a quality soldering iron like the Weller WES51 or Pinecil.
- Tin your wires before soldering.
- Avoid cold joints by heating both wire and pad evenly.
Loctite: The Unsung Hero
- Use Blue Loctite (242) on all metal screws to prevent loosening.
- Avoid Red Loctite unless you want permanent bonds.
- Our team once lost a wheel mid-match due to a loose screw—never again!
Cable Management
- Use zip ties and spiral wrap to keep wires tidy.
- Keep wires away from spinning parts.
- Label your wires for easier troubleshooting.
🏁 Passing Tech Check: Ensuring Your Bot is Legal and Safe
Before you can enter the arena, your bot must pass a rigorous tech inspection.
Common Tech Check Criteria
| Check | Requirement | Why It Matters | |
|---|---|---|---|
| Weight | Within class limits | Fair competition | |
| Weapon Lock | Physical pin to disable weapon | Safety in pits Fail-Safe Robot stops when transmitter off | Prevents runaway bots |
| Sharp Edges | Covered or rounded | Protects handlers | |
| Battery Secure | Proper mounting and wiring | Prevents fires |
Tips to Pass Tech Check
- Bring your bot fully assembled and ready to fight.
- Double-check your weight on a calibrated scale.
- Test your fail-safe multiple times.
- Have spare parts and tools on hand for last-minute fixes.
🏆 Where to Compete: Finding Local Robot Wrestling Events
Ready to throw down? Here’s where to find your next battle.
| Platform | Description | Coverage | Notes |
|---|---|---|---|
| BuildersDB | Event registration and listings | Global | Largest database |
| RobotCombatEvents.com | Comprehensive event calendar | US-focused | Updated frequently |
| NHRL (National Havoc Robot League) | Premier Northeast US league | Northeast US | High competition level |
| Local Maker Spaces | Community build and fight nights | Varies | Great for beginners |
Insider Tip
Join online forums and Discord servers dedicated to combat robotics. Networking with local builders can get you invites to underground or informal events.
If you’re hungry for a visual walkthrough, check out this fantastic beginner’s video that covers everything from choosing your weight class to competing in your first tournament. The presenter shares personal stories, safety tips, and design advice that align perfectly with our recommendations.
Watch it here: How to Get Started in Combat Robotics (Note: Replace with actual URL)
👉 CHECK PRICE on:
- Flysky FS-i6X Transmitter: Amazon | Walmart
- Turnigy 2836 Brushless Motor: Amazon | HobbyKing
- UHMW Plastic Sheets: Amazon | McMaster-Carr
- LiPo Battery (Turnigy Nano-Tech): Amazon | HobbyKing
- FingerTech tinyESC: FingerTech Robotics | Amazon
For more in-depth articles on robot design and competitions, check out our Robot Design and Competitions categories.
💡 Conclusion

Building a robot for robot wrestling is a thrilling journey that combines engineering, creativity, and a dash of battlefield grit. From selecting the right weight class to mastering CAD design, choosing durable materials, and fine-tuning your drive and weapon systems, every step shapes your bot’s destiny in the arena.
Our expert team at Robot Wrestling™ strongly recommends starting small—Antweights or Beetleweights—to learn the ropes without overwhelming complexity or cost. Embrace iterative design: build, test, break, fix, and improve. Remember, even the most fearsome vertical spinners need solid mounts and balanced internals to avoid self-destruction.
A few key takeaways to close the loop on earlier questions:
- Safety is non-negotiable. Always use weapon locks, fail-safes, and proper battery handling.
- Simplicity often wins. Complex systems can fail spectacularly under pressure.
- Community matters. Connect with local builders and leagues to sharpen your skills and find competition.
Whether you dream of building the next Tombstone or just want to crush your friends’ bots at the local maker space, the path is clear: start small, build smart, and keep fighting.
🔗 Recommended Links
Ready to gear up? Here are some trusted sources and products to get you started:
-
Flysky FS-i6X Transmitter & Receiver:
-
Turnigy 2836 Brushless Motor:
-
UHMW Plastic Sheets:
-
Turnigy Nano-Tech LiPo Batteries:
-
FingerTech tinyESC:
-
Recommended Books:
❓ FAQ: Common Robot Building Questions

Where can I find parts and kits for building battle robots?
Finding quality parts is crucial. Trusted suppliers include:
- FingerTech Robotics: Specializes in combat robot parts for Antweights and Beetleweights. FingerTech Robotics
- ServoCity: Offers motors, gearboxes, wheels, and chassis components. ServoCity
- McMaster-Carr: The go-to for raw materials like steel, aluminum, and plastics. McMaster-Carr
- HobbyKing: Great for motors, batteries, and ESCs. HobbyKing
Many builders also use 3D printing services or local maker spaces to fabricate custom parts.
How can I improve the durability of my wrestling robot?
Durability hinges on material choice, design, and assembly quality:
- Use impact-absorbing armor like UHMW plastic or AR500 steel.
- Reinforce weapon mounts and wheel hubs with thread-locking compounds like Blue Loctite.
- Design with a low center of gravity to prevent tipping.
- Use modular components for quick repairs.
- Test your robot extensively before competition to identify weak points.
What are the rules of the official Robot Wrestling League?
Rules vary by league, but common standards include:
- Weight limits per class (e.g., 1lb for Antweight).
- Safety requirements like weapon locks and fail-safes.
- Prohibition of certain weapon types (e.g., liquids, explosives).
- Restrictions on radio frequencies (usually 2.4GHz).
- Match time limits and victory conditions (knockout, judges’ decision).
For a comprehensive overview, see our guide: What Are the Rules of Robot Wrestling? 🤖 Ultimate Guide (2026).
How do I program a robot to perform wrestling moves?
Most combat robots rely on remote control rather than autonomous programming. However, some advanced bots use microcontrollers like Arduino or Raspberry Pi to:
- Control weapon timing.
- Manage sensor feedback (e.g., gyroscopes for stability).
- Automate simple maneuvers.
Programming wrestling “moves” involves integrating sensors and writing control algorithms, but this is usually reserved for advanced builders.
What motors and sensors are needed for robot wrestling?
- Motors: High-torque brushless motors (e.g., Turnigy 2836) for drive and weapon systems.
- Sensors: Optional but useful sensors include gyroscopes, accelerometers, and current sensors to monitor performance and improve control.
- ESCs: Electronic Speed Controllers matched to motor type.
How do I design a robot for competitive wrestling matches?
Focus on:
- Weight distribution: Keep the center of gravity low and balanced.
- Armor: Use materials that absorb or deflect hits.
- Weapon choice: Match your weapon to your drive style and weight class.
- Modularity: Design for easy repair and upgrades.
- Testing: Iteratively test and improve your design.
What materials are best for building a robot wrestling competitor?
- Armor: UHMW plastic for lightweights; AR500 steel or titanium for heavyweights.
- Chassis: Aluminum 7075 for a good strength-to-weight ratio.
- Weapon parts: Hardened steel or titanium, depending on weapon type.
How can I improve my robot’s stability during robot battles?
- Lower the center of gravity by placing heavy components (batteries, motors) as low as possible.
- Use wide wheelbases for better balance.
- Consider suspension or shock-absorbing mounts.
- Avoid tall or top-heavy designs.
Where can I find parts and kits for building a robot wrestling machine?
See the answer above on parts suppliers. Additionally, many online communities and forums offer kits and custom parts. Some popular kits include:
- FingerTech Beetleweight Kit
- Robot Marketplace kits
📚 Reference Links
- RobotShop Community Discussion on Building Robots
- Official BattleBots Website
- Sky Yang’s Robot Fight Experience on LinkedIn
- SPARC Combat Robotics Rules
- RioBotz Combat Robot Tutorial
- FingerTech Robotics Official Site
- ServoCity Robotics Components
- McMaster-Carr Industrial Supplies
- HobbyKing RC Components
Ready to build your champion? The arena awaits! 🏆🤖