Support our educational content for free when you buy through links on our site. Learn more
💸 Robot Wrestling Cost: The Real Price to Build a Champion (2026)


Ever watched a BattleBots match and wondered, “How much cash did that metal beast cost to build?” You’re not alone. At Robot Wrestling™, we’ve seen teams burn through six-figure budgets only to have their champion crumble in the first 30 seconds, while others with $20 Antweights walk away with the trophy. The truth is, the price tag of a competitive robot isn’t just about the parts; it’s about strategy, spares, and the sheer will to rebuild.
In this deep dive, we’re tearing apart the budget from the Antweight garage builds to the Heavyweight industrial monsters. We’ll reveal the hidden costs that catch every first-time builder off guard—from the “robot graveyard” spares you must have to the specialized tools that can make or break your season. Spoiler alert: You don’t need a million dollars to start, but you do need to know where to spend your pennies.
Key Takeaways
- Start Small to Save Big: A competitive Antweight or Betleweight can be built for $30–$1,20, offering the best entry point for beginners without the massive risk of Heavyweight classes.
- The “Spares” Rule: Never budget for just one robot; you must allocate 30–50% of your total budget for replacement parts, as battles are destructive and reliability is key to winning.
- Tools vs. Outsourcing: If you lack a CNC machine or laser cutter, factor in the cost of outsourcing fabrication, which can quickly double your initial build estimate.
- Safety is Non-Negotiable: Investing in proper LiPo safety bags, kill switches, and armor materials isn’t optional; it’s the difference between a winning match and a disqualification.
Table of Contents
- ⚡️ Quick Tips and Facts
- 🤖 A Brief History of Robot Wrestling: From BattleBots to Your Garage
- 💰 The Big Question: How Much Does a Competitive Robot Actually Cost?
- 📏 Step 1: Deciding on Your Robot’s Weight Class and Size
- 🧠 Step 2: Researching the Rules and Setting a Realistic Budget
- 🎨 Step 3: Initial Conceptualization and Design Strategy
- ⚙️ Step 4: Sourcing the Heart and Soul: Motors, Batteries, and Electronics
- 🛠️ Step 5: Mastering Computer-Aided Design (CAD) for Combat
- 🔨 Step 6: Fabrication: From 3D Prints to CNC-Machined Armor
- 🔌 Step 7: Assembly, Wiring, and Control Systems Integration
- 🧪 Step 8: The Crucible: Testing, Tweaking, and Stress-Testing Your Bot
- 🏆 Step 9: Competition Day: What to Expect and How to Prepare
- 📉 Step 10: Post-Battle Evaluation and Iterative Improvements
- 🛡️ Essential Safety Gear and Workshop Requirements
- 🧩 Common Pitfalls That Will Drain Your Wallet and Your Spirit
- 🏅 Be the First to Share: Your Build Journey
- 🎓 Student Contests and Educational Robotics Programs
- 🏁 Conclusion
- 🔗 Recommended Links
- ❓ FAQ
- 📚 Reference Links
⚡️ Quick Tips and Facts
Before you dive into the deep end of the robot wrestling pool, let’s splash around with some hard truths that will save you thousands of dollars and a lot of heartache.
- The “Free” Robot Myth: You might think you can build a bot for $50 using parts from a broken toaster. Spoiler alert: You can’t. A competitive robot requires precision engineering, high-torque motors, and armor that won’t shatter on impact.
- The Real Cost Driver: It’s not the robot itself; it’s the spares. In a tournament, your bot might take a hit that destroys a wheel, a motor, or a weapon blade. If you don’t have backups, your tournament is over. Budget at least 30-50% extra for replacement parts.
- Weight Class Matters: Building a 150g Antweight is exponentially cheaper than a 25kg Heavyweight. The cost doesn’t scale linearly; it scales exponentially with weight due to the power and armor requirements.
- Tools are an Investment: If you don’t own a drill press, a good soldering iron, or a CNC machine, you’ll need to factor in the cost of outsourcing fabrication or buying the tools.
- Safety First: Never skimp on LiPo battery safety bags and proper shielding. A fire in the arena isn’t just a “cool effect”; it’s a disqualification and a potential lawsuit.
Want to see a real-world breakdown of costs from scratch? Check out the perspective from the first YouTube video embedded in our community discussions, which details building an insect-weight bot from zero tools. You can find that detailed breakdown here: 🎥 Featured Video: Building a Robot from Scratch.
🤖 A Brief History of Robot Wrestling: From BattleBots to Your Garage
The dream of building a fighting robot isn’t new, but the accessibility of the technology is. We at Robot Wrestling™ have watched the scene evolve from backyard experiments in the 90s to the high-octane spectacle of the Robot Wrestling League and BattleBots today.
In the early days, teams like Mortis and Son of Whyachi dominated with massive, gasoline-powered spiners. The cost of entry was astronomical, often requiring industrial workshops and six-figure budgets. Fast forward today, and the rise of 3D printing, affordable brushless motors, and LiPo batteries has democratized the sport.
Now, a student in a high school shop class can build a competitive Betleweight (1.5kg) for a fraction of the cost of a 190s heavyweight. However, the competition has gotten fiercer. As noted in our analysis of 🤖 Top 5 Robot Wrestling Leagues & Tournaments (2026), the barrier to entry is lower, but the skill ceiling is higher.
“If the robots were to move about the ring randomly, what is the chance of my robot weapon striking your weak point?” — This question, posed by veteran engineers, highlights that geometry is just as important as budget. A cheap bot with smart design can beat an expensive bot with poor geometry.
The history of the sport is a testament to iterative design. Teams that fail fast, learn, and rebuild often dominate. Whether you are looking at the History of Robot Wrestling on our site or the legendary matches of Tombstone vs. Hypershock, the lesson is clear: Reliability beats raw power every time.
💰 The Big Question: How Much Does a Competitive Robot Actually Cost?
This is the question keeping you up at night, isn’t it? “How much does it typically cost to build a competitive robot for wrestling?” The answer is frustratingly simple: It depends.
It depends on your weight class, your tooling, your experience level, and whether you are building a “one-off” or a competition-ready machine with spares.
Cost Breakdown by Weight Class
| Weight Class | Typical Weight | Estimated Build Cost (Parts Only) | Estimated Total Cost (With Tools & Spares) | Difficulty Level |
|---|---|---|---|---|
| Antweight | 150g (5.3 oz) | $150 – $30 | $30 – $60 | Beginner |
| Betleweight | 1.5kg (3.3 lbs) | $30 – $60 | $60 – $1,20 | Intermediate |
| Featherweight | 3kg (6.6 lbs) | $60 – $1,20 | $1,20 – $2,50 | Intermediate/Advanced |
| Lightweight | 6kg (13.2 lbs) | $1,50 – $3,0 | $3,0 – $6,0 | Advanced |
| Heavyweight | 25kg (5 lbs) | $5,0 – $15,0+ | $10,0 – $30,0+ | Expert/Pro |
Note: These figures assume you are buying new components. Used parts from the “robot graveyard” can slash these costs by 50%, but come with reliability risks.
The Hidden Costs You Didn’t Think Of
Many first-time builders forget the indirect costs:
- Shipping: Heavy armor and motors can cost a fortune to ship.
- Consumables: Welding rods, solder, glue, and sandpaper add up.
- Event Fees: Entry fees for tournaments can range from $50 to $20 per class.
- Travel: If the event isn’t local, you need to budget for gas, hotels, and food.
As the EnginerDog article on competitive ingredients suggests, the Heavyweight class is a different beast entirely. It requires “hundreds of man-hours” and significant technical expertise. For the average enthusiast, the Antweight or Betleweight classes offer the best balance of cost vs. excitement.
📏 Step 1: Deciding on Your Robot’s Weight Class and Size
Before you buy a single screw, you must decide what you are building. The weight class dictates your budget, your design complexity, and the tools you need.
Why Weight Class is Everything
- Antweights (150g): Perfect for beginners. They are small, cheap, and can be built on a kitchen table. The physics are forgiving, and the cost of mistakes is low.
- Betleweights (1.5kg): The “Goldilocks” zone. They are big enough to feel powerful but small enough to be affordable. This is where most Robot Wrestling League local events focus.
- Heavyweights (25kg): The “BattleBots” tier. These require industrial machinery, safety certifications, and a budget that rivals a small car. Do not start here.
The “Start Small” Philosophy
We’ve seen too many teams burn out because they tried to build a 25kg spinner as their first project. They ran out of money before the first match. Start with an Antweight. Learn the basics of wiring, control, and armor. Once you’ve won a few local matches, then scale up.
Pro Tip: Check the Robot Wrestling League rules for your region. Some leagues have specific restrictions on weapon types or materials that might influence your choice of weight class.
🧠 Step 2: Researching the Rules and Setting a Realistic Budget
Once you’ve picked a class, read the rulebook. Seriously, read it three times.
The Rulebook is Your Bible
Every league has different rules.
- Weapon Restrictions: Some leagues ban flamethrowers or saws. Others limit weapon RPM.
- Material Limits: Can you use titanium? UHMW plastic? Steel?
- Safety Gear: Do you need a kill switch? A specific battery type?
If you build a bot that violates a rule, you won’t just lose; you’ll be disqualified, and your money is wasted.
Setting Your Budget
Let’s do the math. If you want to build a Betleweight:
- Chassis & Armor: $10
- Motors & ESCs: $150
- Battery & Charger: $80
- Electronics (Radio, Receiver): $60
- Spares (2x sets): $150
- Tools (if you don’t have them): $20
Total: ~$740
Is this affordable for you? If not, consider Antweights or look for sponsors. Many local machine shops will donate materials in exchange for a logo on your bot.
🎨 Step 3: Initial Conceptualization and Design Strategy
Now comes the fun part: Design. But don’t just draw a cool shape. You need a strategy.
The “Rock-Paper-Scissors” of Robot Design
As highlighted in our analysis of competitive ingredients, the meta is a cycle:
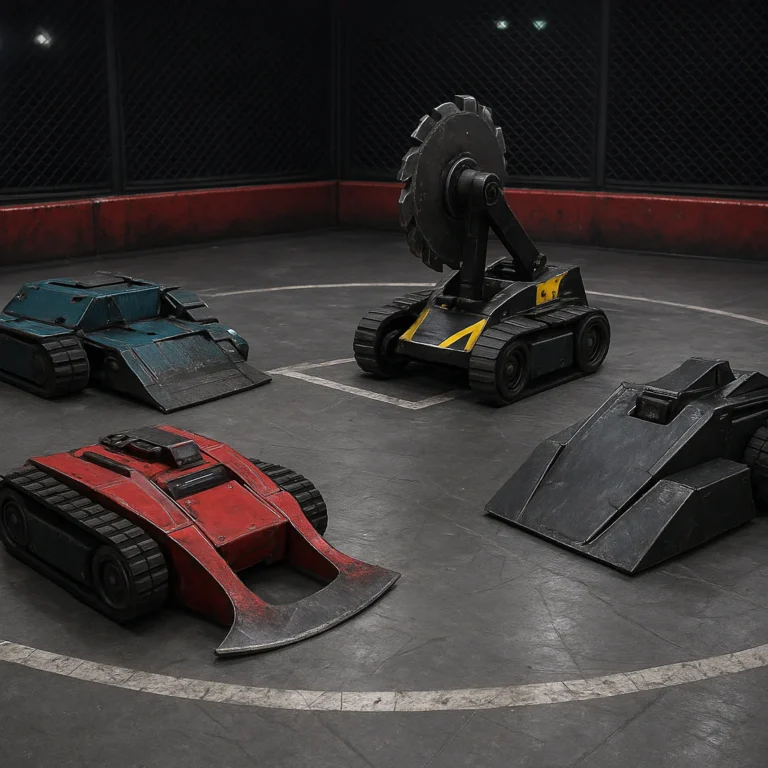
- Horizontal Spiners: Great against vertical spiners, but weak against wedges.
- Vertical Spiners: Excellent at tossing wedge bots, but vulnerable to horizontal spiners.
- Wedge Bots: Deflect horizontal blows, but get tossed by vertical spiners.
Which one should you choose?
- If you are a beginner, a Wedge or a Drill bot is often the most reliable. They have fewer moving parts and are less likely to self-destruct.
- If you are an experienced engineer, a Spinner offers high damage potential but requires precise CAD and balancing.
The Geometry of Destruction
Your robot’s shape determines its survivability. A Tombstone style bot has a massive weapon but leaves the back exposed. A Full-Body Spinner is terrifying but hard to drive.
- Question: If your robot moves randomly, what is the chance of your weapon hitting the opponent’s weak point?
- Answer: Design for probability. Make your weapon hit area as large as possible.
⚙️ Step 4: Sourcing the Heart and Soul: Motors, Batteries, and Electronics
This is where the money goes. The powertrain is the most critical part of your bot.
Motors: The Muscle
- Brushed Motors: Cheap, simple, but wear out quickly. Good for Antweights.
Brands: Maxon, Faulhaber.
Where to buy: Search for Brushed Motors on Amazon | Maxon Official Site - Brushless Motors: Powerful, efficient, and durable. Essential for Betleweights and up.
Brands: Turnigy, HobbyKing, Orbital.
Where to buy: Search for Brushless Motors on Amazon | HobbyKing Official Site
Batteries: The Lifeblood
LiPo (Lithium Polymer) batteries are the standard. They are light and pack a punch.
- Safety Warning: LiPos can catch fire if punctured. Always use a LiPo safe bag for charging and storage.
- Brands: Turnigy, Gens Ace, Tattu.
- Where to buy: Search for LiPo Batteries on Amazon | Tattu Official Site
Electronics: The Brain
- Speed Controllers (ESCs): Must handle the current of your motors.
Brands: Castle Creations, Hobbywing.
Where to buy: Search for Robot ESCs on Amazon | Castle Creations Official Site - Radio Systems: You need a reliable 2.4GHz system.
Brands: FlySky, Futaba, FrSky.
Where to buy: Search for RC Transmitters on Amazon | Futaba Official Site
👉 CHECK PRICE on:
🛠️ Step 5: Mastering Computer-Aided Design (CAD) for Combat
You can’t just “wing it” with a hammer and saw anymore. CAD is essential for precision.
Why CAD Matters
- Fit and Finish: Ensures your motors fit in your chassis.
- Weight Distribution: Helps you balance the bot so it doesn’t tip over.
- Simulation: Some software allows you to simulate stress on parts.
Recommended Software
- Fusion 360: The industry standard for hobbyists. Free for personal use.
Link: Autodesk Fusion 360 - SolidWorks: Professional grade, expensive, but powerful.
- FreeCAD: Open-source and free, great for beginners on a budget.
Pro Tip: Design your bot in modular sections. If a wheel breaks, you should be able to replace just that part without rebuilding the whole chassis.
🔨 Step 6: Fabrication: From 3D Prints to CNC-Machined Armor
Now you have the design. How do you make it real?
Material Choices
- Polycarbonate (Lexan): Great for chassis and armor. It’s tough and absorbs impact well.
- Aluminum (6061-T6): Good for structural parts. Easy to machine.
- Titanium: The holy grail. Strong and light, but expensive and hard to machine.
- UHMW Plastic: Excellent for wedges and skids. It’s slippery and durable.
Fabrication Methods
- 3D Printing: Perfect for prototypes and non-structural parts. Use PETG or ABS for strength.
Brands: Prusa, Creality.
Where to buy: Search for 3D Printers on Amazon | Prusa Research - CNC Machining: For high-precision metal parts. If you don’t have a CNC, use a local machine shop.
- Laser Cutting: Great for cutting aluminum or acrylic sheets.
Common Pitfall: Don’t use plastic for high-stress weapon mounts. It will shatter. Use metal or reinforced composites.
🔌 Step 7: Assembly, Wiring, and Control Systems Integration
This is where the magic happens. Wiring is the most common point of failure.
Wiring Best Practices
- Soldering: Use a good soldering iron. Cold joints will fail under vibration.
- Strain Relief: Secure all wires with zip ties or heat shrink. If a wire pulls loose, your bot dies.
- Shielding: Keep high-current wires away from signal wires to prevent interference.
Control Systems
- Radio Link: Test your radio range. If you lose signal, your bot becomes a hazard.
- Kill Switch: Always have a physical kill switch on the bot. It’s a safety requirement for most leagues.
Did you know? Some teams use telemetry to monitor battery voltage and motor temperature in real-time. This is a game-changer for reliability.
🧪 Step 8: The Crucible: Testing, Tweaking, and Stress-Testing Your Bot
You built it. Now, break it.
The “Washing Machine” Test
As the EnginerDog article suggests, ask yourself: “Could my bot destroy a washing machine without killing itself?”
- Drive Test: Drive it into walls. Does it self-right?
- Weapon Test: Fire the weapon. Does it vibrate the bot apart?
- Drop Test: Drop it from a height. Does the armor hold?
Iterative Improvement
- Document everything. If a part breaks, take a photo and note why.
- Modify and retest. This cycle is the heart of robot engineering.
🏆 Step 9: Competition Day: What to Expect and How to Prepare
The day has arrived. You’re at the Robot Wrestling League event.
Pre-Match Checklist
- Battery Check: Are your LiPos charged and balanced?
- Spare Parts: Do you have extra wheels, motors, and armor?
- Tools: Bring a soldering iron, screwdrivers, and pliers.
- Team: Assign roles. Who drives? Who repairs? Who manages the pit?
During the Match
- Stay Calm. Panic leads to mistakes.
- Adapt. If your weapon breaks, switch to a driving strategy.
- Respect the Opponent. Robot wrestling is a sport. Shake hands (or high-five) after the match.
📉 Step 10: Post-Battle Evaluation and Iterative Improvements
Win or lose, the real work begins now.
The Debrief
- Analyze the Damage: What broke? Why?
- Review the Match: Watch the video. Did you make a tactical error?
- Update the Design: Fix the weak points.
The Cycle Continues
Robot wrestling is an iterative process. Your first bot might be a disaster. Your second might be a contender. Your third might be a champion. Never stop improving.
🛡️ Essential Safety Gear and Workshop Requirements
Safety is non-negotiable.
Personal Protective Equipment (PE)
- Safety Glasses: Always wear them. Metal shards fly fast.
- Gloves: Heavy-duty gloves for handling hot motors and sharp edges.
- Hearing Protection: Spiners are loud.
Workshop Requirements
- Ventilation: If you are welding or soldering, you need good airflow.
- Fire Extinguisher: Have a Class D fire extinguisher for metal fires and a Class ABC for electrical fires.
- First Aid Kit: Cuts and burns are common.
🧩 Common Pitfalls That Will Drain Your Wallet and Your Spirit
We’ve seen it all. Here are the traps to avoid:
- Over-Engineering: Making a bot too complex. Simple is better.
- Ignoring Spares: Going to a tournament with no backups.
- Bad Soldering: The #1 cause of failure.
- Underestimating Weight: Adding too much armor and exceeding the weight limit.
- Skipping Testing: Entering a match without a full stress test.
Remember: A reliable bot that wins 50% of its matches is better than a powerful bot that breaks in the first round.
🏅 Be the First to Share: Your Build Journey
We want to hear from you! Did you build your first bot? Did you win a match? Share your story with the Robot Wrestling™ community.
- Post your build logs on our forums.
- Upload videos of your matches.
- Connect with other builders and learn from their experiences.
Your journey inspires others. Don’t keep it to yourself!
🎓 Student Contests and Educational Robotics Programs
Robot wrestling isn’t just for pros. It’s a fantastic educational tool.
Why Students Love It
- STEM Learning: Teaches physics, engineering, and coding.
- Teamwork: Requires collaboration and communication.
- Creativity: Encourages out-of-the-box thinking.
Getting Involved
- FIRST Robotics: A global program for students.
- Local Leagues: Many cities have youth divisions.
- School Clubs: Start a club at your school!
Question: How do you keep students engaged in robotics teams? Check out this discussion on Facebook for insights from educators and students.
🏁 Conclusion

So, how much does it typically cost to build a competitive robot for wrestling?
The answer is: It depends on your ambition.
- For a beginer Antweight, you can get started for $30-$60.
- For a competitive Beetleweight, expect to spend $60-$1,20.
- For a Heavyweight, be prepared to invest $10,0+.
But the cost isn’t just about money. It’s about time, passion, and resilience. The journey from a sketch on a napkin to a roaring machine in the arena is one of the most rewarding experiences you can have.
Our Recommendation:
Start small. Build an Antweight. Learn the basics. Fail, learn, and rebuild. Once you’ve mastered the small scale, scale up. Don’t let the cost scare you away. The Robot Wrestling League is waiting for you.
Ready to build? Grab your tools, fire up your CAD software, and let’s make some noise!
🔗 Recommended Links
Essential Tools & Components
- 3D Printers: Creality Ender 3 V3 on Amazon | Creality Official
- LiPo Batteries: Tattu R-Line on Amazon | Tattu Official
- Brushless Motors: Turnigy Multistar on Amazon | HobbyKing
- RC Transmitters: FlySky FS-i6 on Amazon | FlySky Official
- Safety Gear: LiPo Safe Bags on Amazon | HobbyKing
Books & Resources
- “Build Your Own Combat Robot” by Mark W. Tilden: Amazon Link
- “Robotics: A Very Short Introduction” by Alan Winfield: Amazon Link
❓ FAQ

How can beginners reduce costs when building their first wrestling robot?
Start with an Antweight. The parts are cheap, and you can often find used components from the “robot graveyard” (broken bots from previous seasons). Also, 3D print your chassis instead of machining it, and use brushed motors instead of brushless ones for the first build.
Read more about “🤖 Robot Design for Battle: The Ultimate 2026 Guide to Winning”
What are the hidden expenses in designing and building a robot for wrestling competitions?
Spares are the biggest hidden cost. You will break parts. Also, shipping heavy materials, event entry fees, and travel costs can add up quickly. Don’t forget the cost of tools if you don’t already own them.
How much does custom programming add to the overall cost of a wrestling robot?
For most hobbyists, custom programming is minimal. You’ll likely use pre-made firmware for your ESCs and radio. However, if you want advanced features like telemetry or autonomous modes, you might need to hire a programmer or spend significant time learning C++ or Python.
Are there affordable alternatives for building a robot wrestling chassis?
Yes! Polycarbonate (Lexan) is a great alternative to metal. It’s tough, lightweight, and easy to cut. UHMW plastic is also excellent for wedges. You can also use 3D printed parts for non-structural components.
What is the average price range for motors and electronics in robot wrestling?
For an Antweight, expect to pay $50-$10 for motors and electronics. For a Betleweight, it’s $150-$30. Heavyweights can cost $1,0+ just for the powertrain.
Read more about “How Much Does It Cost to Build a Competitive Robot Wrestler? 🤖 (2026)”
How do material choices impact the budget for a competitive robot?
Titanium is the most expensive but offers the best strength-to-weight ratio. Aluminum is a good middle ground. Polycarbonate and UHMW are affordable and durable. Choosing the right material can save you hundreds of dollars.
Read more about “🤖 DIY Fighting Robots: The Ultimate 2026 Build Guide (12 Steps)”
What are the main components affecting the cost of building a wrestling robot?
The weapon system (motors, blades, capacitors) and armor are the biggest cost drivers. Batteries and electronics also add up. Don’t forget the spares.
Read more about “12 Killer Robot Combat Designs That Dominate in 2026 🤖”
What is the average budget for building a robot for the Robot Wrestling League?
For a competitive Antweight, budget $30-$60. For a Betleweight, $60-$1,20. For a Heavyweight, $10,0+.
Read more about “🤖 RWL Rules Explained: 12 Secrets to Winning in 2026”
How much do high-torque motors cost for competitive robot wrestling?
High-torque brushless motors for Betleweights can cost $50-$10 each. For Heavyweights, they can cost $20-$50 each.
Read more about “🤖 Top 5 Robot Wrestling Leagues & Tournaments (2026)”
What are the cheapest materials for building a durable robot chassis?
Polycarbonate (Lexan) and UHMW plastic are the cheapest and most durable options for chassis and armor. 3D printed PETG is also a good budget option.
How much does it cost to hire a professional robot designer for a wrestling bot?
Hiring a professional can cost $5,0-$20,0+ depending on the complexity. Most hobbyists learn to design themselves using CAD software.
Are there grants or sponsorships available for building competitive fighting robots?
Yes! Many local machine shops, tech companies, and universities offer sponsorships. You can also apply for STEM grants from organizations like FIRST or NASA.
What is the cost of replacing armor after a robot battle?
It varies, but expect to spend $50-$20 per match on armor replacements for a Betleweight. Heavyweights can cost $50+ per match.
How much does it cost to transport a wrestling robot to competition events?
Shipping can cost $50-$20 depending on the size and weight. Travel costs (gas, hotels, food) can add $20-$1,0+ per event.
Read more about “🤖 Where to Find Robot Wrestling Events in 2026: 17+ Live & Streamed!”
📚 Reference Links
- BattleBots Wikia: BattleBots History
- EnginerDog: Key Ingredients for a Competitive Combat Robot
- Autodesk Fusion 360: Fusion 360 for Makers
- HobbyKing: Robot Parts & Components
- FIRST Robotics: Get Involved
- Facebook Group: How to keep students engaged in robotics team?
- Robot Wrestling League: Official Website